Hi there, folks!

It’s such a treat to be here with you sweet readers today, and I’m so grateful to Becky for having me by for a visit!

My name is Abbie from Five days…5 ways and Secondhand or Bare Bottom. That’s right. I run not one but two blogs. Because being a wife, a mama to three children under 6, homeschooling, teaching fitness classes, trying to keep my house reasonably clean, and knocking out a few DIY projects now and then doesn’t keep me busy enough.

Yeah. Right. ; )

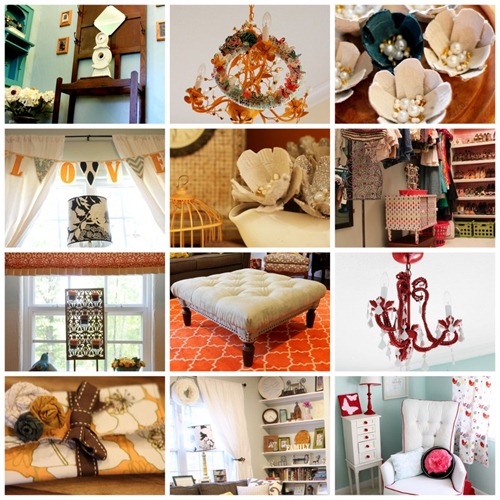
Here’s a quick peak at some of the things that I’ve been up to at Five days…5 ways, my primary blog where I write about a different theme for each day of the week (Move-it Monday—fitness, Try-it Tuesday—tutorials, Wardrobe Wednesday—fashion, 5 Things Thursday—a linky party where you can join me in posting a list with pics of 5 items that go with our theme for the week, and Feature Friday— what/whomever I want to feature that day):

Collages

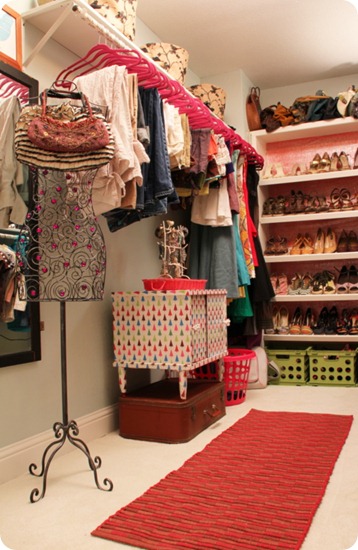
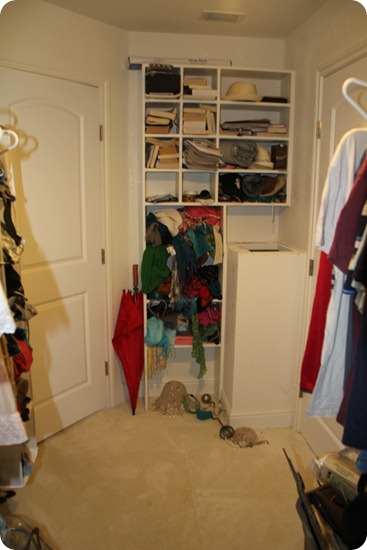
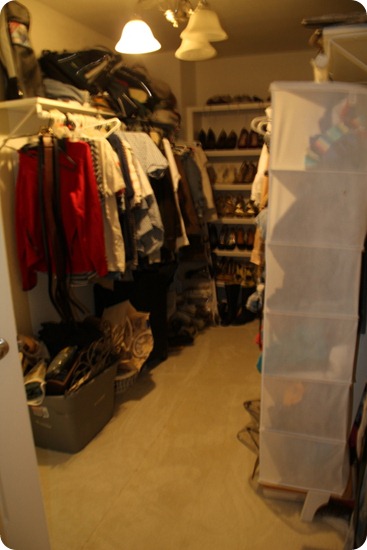
Today, I’m sharing a taste of my master closet, which I completely overhauled so that instead of looking like this:

IMG_2908-1

Lord a’mercy!

…it now looks like this:

IMG_4745

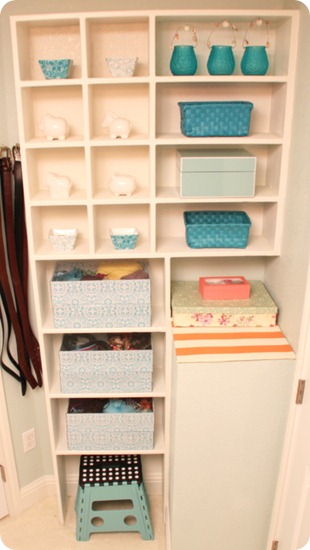
…and from this:

IMG_2912

…to this:

IMG_4779-1

We built 98% of our house ourselves, and my amazing husband custom-made the shoe-shelves, cubbies, and even the laundry chute…I ♥ him! Still, nothing was being utilized or organized to its fullest potential.

But it was nothing a little bucket-load of DIY elbow grease couldn’t remedy.

Okay, so paint, glue, and sweat is more like it, but either way, I am beyond happy with the results, and it makes going in there to find outfits to wear for my 100% thrifted style blog, Secondhand or Bare Bottom, a fun excursion rather than a chore.

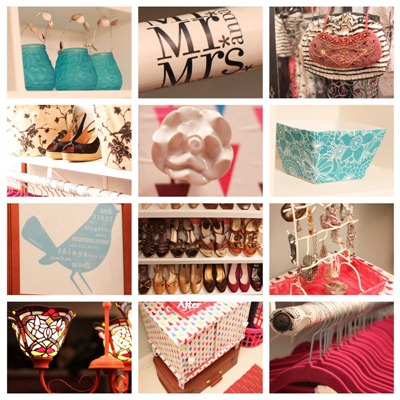
Here’s a round-up of some of my favorite details, including the closet rods I decoupaged with some “Mr. and Mrs.” gift-wrap I found at Walmart (let’s be honest—there never was a Mr. who got his fair share of a closet, but I did leave him one rod!), a garage sale chandelier I revitalized with some stained glass shades, a few Goodwill treasures, and several other thrifty finds I rounded up to achieve a knock-out effect without getting knocked out by the bill (the entire closet reno ran us less than $150):

2011-07-27

Oh, aqua and fuchsia, how I love thee!

Want to see the entire transformation? Here you go!

I hope you’ll take the time to stop by for a visit at either/both of my blogs! I love meeting new people!

And a big thanks again, Becky, for letting me share my little corner of the blogosphere with your awesome readers today!
I love hearing from you guys!

Hello, lovely readers!

I’m so excited to be here as a new monthly contributor for The Girl Creative and want to say a big thanks to Diana for having me join her team!

My name is Abbie from Five days…5 ways, and I’m a thriftaholic.

IMG_8877

Whew! That feels good to get off my chest! : )

What that means for you guys is that each month here at TGC, I’ll be sharing what I do to repurpose, restore, or refresh some of my thrifted treasures. And today, for my very first magic act project, I thought I’d share a dresser redo that I’m pretty pleased with.

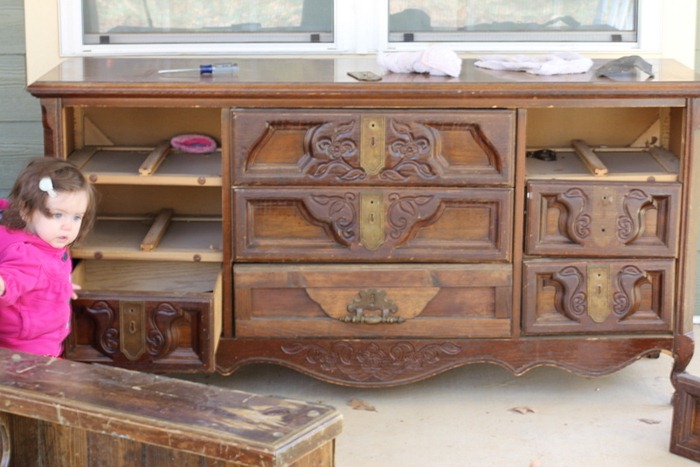
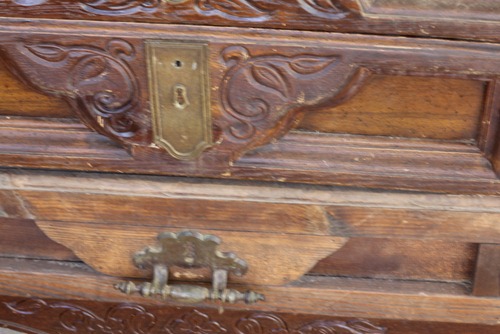
I spotted this sad, neglected, dirty old dresser at Goodwill (my thrifting haunt of choice…I even have an entire style-blog full of Goodwill fashion finds) a few months back and fell in love with the floral details, the key-hole plates, and the curvy lines.

What I didn’t love: the musty smell, the numerous dings and dints, and the drawers that I had to pry open with one foot braced against the wall.

IMG_9030

Nothing like an adorable little helper to make a nasty task (see that grimy pink scrunchy from 1973?) a little more fun.

IMG_9031

When the manager knocked the price down from $25 to $15, I figured it was worth it to take the dresser on, “issues” and all.

Now, because of the drawers, I wasn’t keen to store anything that I needed to access often, but I had been looking for a unique piece for my fabric collection, and I was sure this one could do the trick.

Sometimes, you don’t have to turn a flower pot into a telephone to “repurpose” an item. Sometimes, it just takes a tiny step outside the box to discover a new but similar use for something with loads of potential.

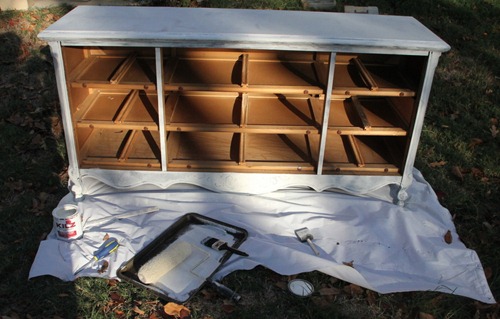
I took that step and loaded Collette (yup, just decided that now) in my van, scrubbed her down, and gave her a good coat of Kilz oil-based primer.

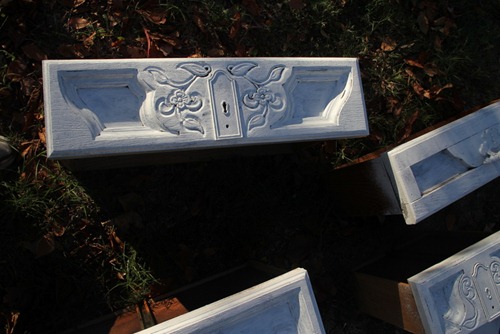
IMG_9043IMG_9044

Then, I sprayed the keyhole plates with Rustoleum’s Heirloom White because I wanted a little contrast and focus on the details:

Next, I hauled out a half-empty can of Sherwin Williams Quite Coral—the same shade that I used to transform a garage sale chandy in a master closet makeover I finished this past summer—and got to rolling and brushing to my little heart’s content (okay, so my heart would have been a little more content with having cookies and milk while paging through the latest issue of Anthro, but none of that would have gotten get the dresser done, so…).

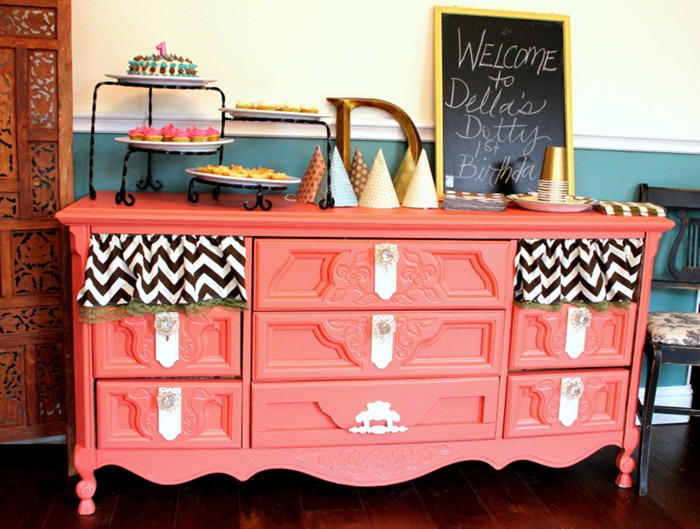
Here she is, all gussied up, better than new, if you ask me:

IMG_9323

Just like I’d planned, I put Collette in my craft room and stuffed her full of fabric.

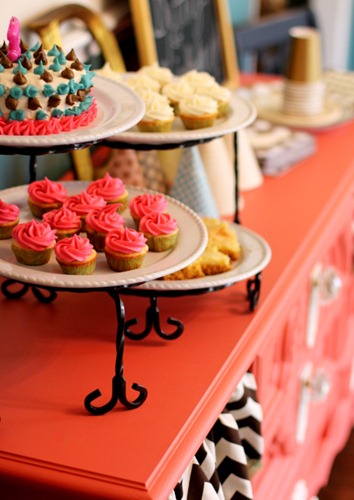
OH, and speaking of repurposing, I also used Collette as a sideboard for all the treats at my daughter, Della’s, 1st birthday party.

IMG_9345

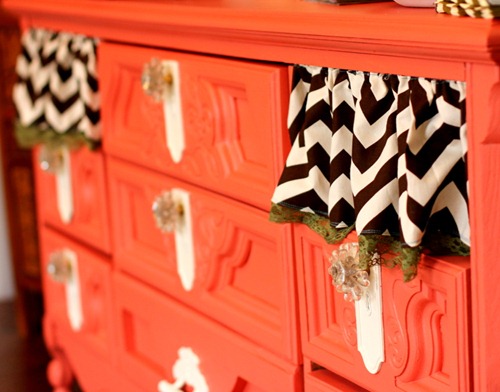
Two of the drawers weren’t salvageable, so I made little “drawer curtains” out of Premier Prints zigzag fabric + some clearance lace I had in my stash.

IMG_9344

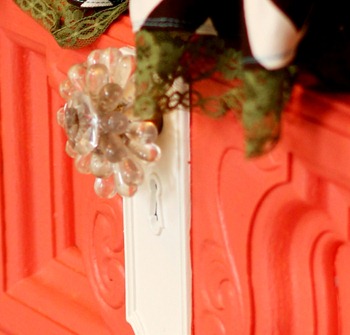
I also bought these fantastic knobs for 1/2 off at Hobby Lobby. 6 of them still cost more than I paid for the entire dresser, but in my opinion, they are sooooo worth it!

IMG_9312

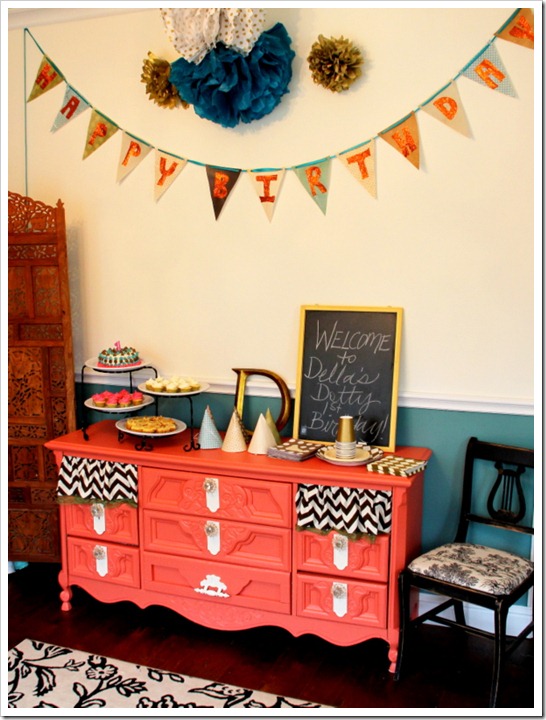
Here’s a shot of the whole birthday vignette (man, I wish I’d dropped that banner a little lower!).

IMG_9339

IMG_9342IMG_9341

And here’s a shot of the adorable little ladybug that inspired the party-theme.

IMG_9175

I couldn’t resist. Can you blame me?

Here’s the cost breakdown for the whole project:

Dresser: $15

Knobs: $27

Primer (I used maybe 1/2): $3

Spray paint (I used 1/4 of a can): $1.50

Paint (already had it): $0

Fabric (already had it): $0

Miscellaneous other supplies: 4.50

TOTAL: $51

So, what do you think? Worth the effort?

I’m pretty smitten, but I’d love to hear your thoughts!

Oh, and I’d LOVE to have you stop by for a visit at:

five days five ways | because every day is different

Here’s a quick peak at a few of my other projects:

Collages

I love hearing from you guys!

Hey there, folks!

I’m more than a little excited (squeal!) that Jamielyn is having me by for a visit to meet all you lovely I Heart Naptime (and, boy, do I!) readers!

My name is Abbie from Five days…5 ways and Secondhand or Bare Bottom. That’s right. I run not one but two blogs. Because being a wife, a mama to three children under 6, homeschooling, teaching fitness classes, trying to keep my house reasonably clean, and knocking out a few DIY projects now and then doesn’t keep me busy enough.

Raise your hand if you don’t believe me.

Here’s a quick peak at some of the things that I’ve been up to at Five days…5 ways, my primary blog where I write about a different theme for each day of the week (Move-it Monday—fitness, Try-it Tuesday—tutorials, Wardrobe Wednesday—fashion, 5 Things Thursday—a linky party where you can join me in posting a list with pics of 5 items that go with our theme for the week, and Feature Friday— what/whomever I want to feature that day):

Collages

I know you’ve been blasted with Christmas crafts for the past month from every corner of the blogosphere, but I’d hardly be worth my blogging salt if I didn’t at least attempt to make a contribution.

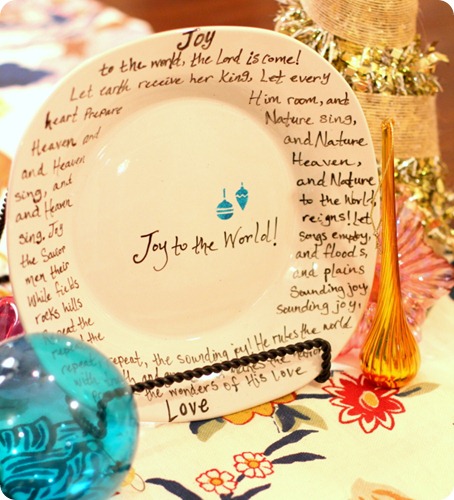
So, today, I’m sharing my** Easy DIY Christmas Carol Plates with you (**all credit for the original concept must go to the super-talented Stephanie of Brooklyn Limestone from whom I stole kindly borrowed the idea).

It’s a super-simple but high-impact idea that even those with the blackest of crafty thumbs can pull off with ease and style.

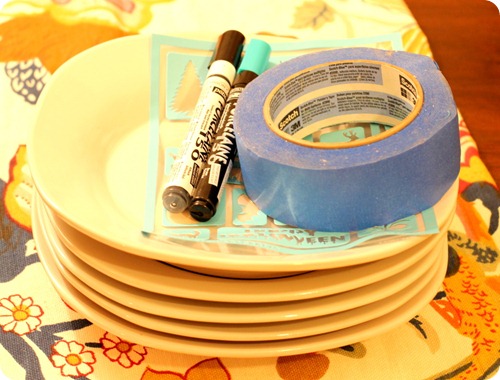
Here’s what you’ll need:

IMG_9612

    • Plates (I got mine for a dollar each at one of the many dollar store options in our area)
    • Porcelaine 150 pens
    • Painter’s tape (pardon my “tape lint”)
    • Holiday-themed stencil (mine is Martha Stewart)

And that’s it. See? Easy-peasy?

You’ll never guess how many steps there are. Check it out:

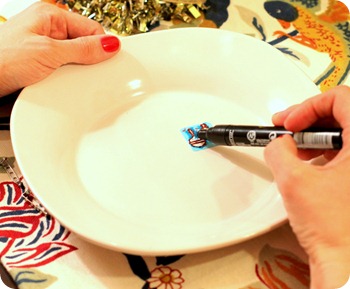
1. Choose your stencil design and the placement on your plate. Then choose the color of Porcelaine 150 pen you want to use (available online or at Michael’s…use a 40% coupon there, and you’ll save yourself a couple of bucks), and fill in the design (the “bullet-tip” that I used for this process can be a bit touchy, so make sure you treat him nice, or he’ll bleed all over your plate, and you’ll have to wipe up the mess with a paper towel and start over…not that I would know anything about this).

IMG_9595-1

I chose the “ornament” stencil design and the carol, “Joy to the World”—classic and meaningful to me when I consider the wonder of Jesus’s birth and the way His love beautifies my life on a daily basis.

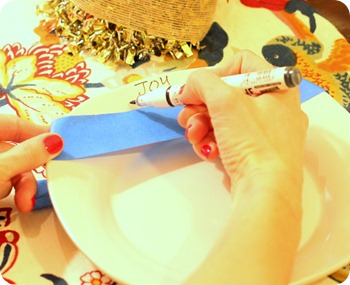
2.  Tape off a straight line to use as a guide for your text, and begin freehanding your carol lyrics. I only wrote on the raised portion of the plate, but you could continue writing all the way across if you prefer. Continue moving the tape down the plate as a ruler until you reach the bottom (you might be better at eyeballing “straightness” than I am and could do without the tape, but I tried that and, well, let’s just say that Mr. Paper Towel had to make his second appearance in 5 minutes). 

IMG_9593-1

And…you’re done!

Whoa!

A two-step tutorial?!!

Suh-weet!

Oh, wait, I almost forgot.

3. The Porcelaine pens are specifically designed to write on dishware, so it’s super-important to follow the baking (yes, baking) directions on the pen to “set” the ink on your plate surface or else the first time you stick it in the dishwasher, all of your hard taping + stenciling + lovely handwriting work will literally be washed down the drain (this didn’t happen to me, thank goodness!). 

Okay, so it was a THREE step tutorial. Still, not too bad, if you ask me.

Ready to see the results?

Well, all right then:

IMG_9608-1

Voila!

A simple, elegant way to display your Christmas spirit.

Oh, and if you want to actually eat off of your plates, I suppose you could do that too (but only after you’ve done the baking process…check, check).

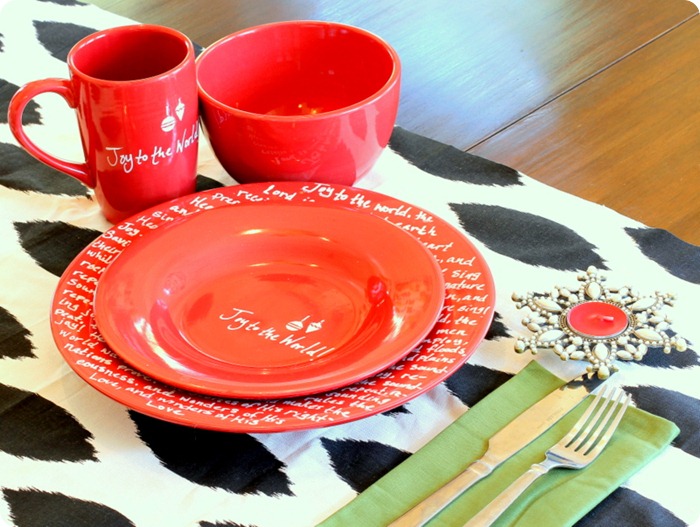
I used this concept to make a 16-piece set that I gave away as part of a big fundraiser I did last month, and I think they’ll work great as the actual dinnerware at a small Christmas party or family gathering:

This also proves that white plates aren’t your only option, which should make you color-enthusiasts out there (yup, I’m a proud card-carrying member of that club…did you see my projects collage??!) happy!

Well, that’s it for me today, folks! But I’d love to you have by either of my blogs for a visit and a chat (we bloggers love us some reader-comments, in case you haven’t heard! : ))

Thanks again, Jamielyn, for having me! You are truly a gracious hostess (and a super-talented blogger)!

P.S. If you’re a blogger, and you like all things Christmas, then be sure to check out a fantastic Christmas linky party I’m hosting with 7 other awesome bloggers!

Check it out!

five days five ways christmas linky party | because every day is different

We’d love it if you’d link up your Christmas-y creativity! And even if you’re not a blogger, be sure to swing by for lots of inspiration and eye-candy!

I love hearing from you guys!