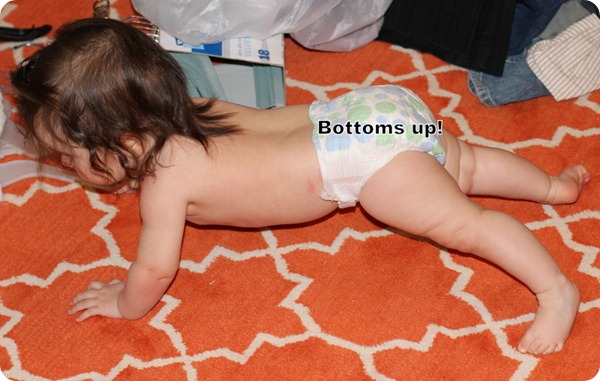
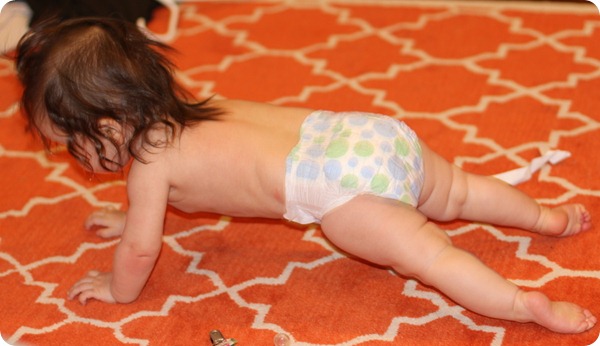
**Update** Adelaide heard about this post and insisted on doing a push-up tutorial of her own:
Pardon the mess. That’s the contents of my master closet, which is currently strewn about my living room (big reveal next Tuesday!)
And now, with her back as straight as Gwyneth Paltrow’s hair.
Go, Della, go!
Although I’ve been an exercise instructor for four years, I hardly consider myself a health and fitness expert. I do strive to be excellent in my areas of interest (i.e. the specific formats I teach), but I don’t have a kinesiology or sports medicine degree or a personal trainer’s certification and therefore tend to limit my advice to tried-and-true methods that produce results.
What that means is that when anyone asks me the best/least complicated way to get stronger and more toned, my answer is almost always, “Do push-ups.”
Need to work on your six-pack?
Do push-ups.
Need to strengthen your arms?
Do push-ups.
Want better posture?
Do push-ups.
Want whiter teeth?
Do push-ups.
Okay, maybe not that last one, but everything else, and much more, can be yours (for the low, low price of $19.99…sorry, got carried away) if you’ll just be diligent to knock out even as few as 25 push-ups a day.
Some of you are thinking, “I’ve heard all this before…yawn,” and some of you are thinking, “I will never ever be able to do even one of these, much less 25, you fitness fanatic,” (the middle ground has already flicked through the push-up montage I so painstakingly crafted for you in the 196 degree heat and has moved on to see what the Pioneer Woman is cooking)…
But whether you’re a fitness pro or a novice (I’m ignoring the middle ground since y’all are now rummaging through your pantries looking for cinnamon roll ingredients), chances are, you have committed (or will commit) some of the common errors I’ve illustrated below.
But first the DO’S:
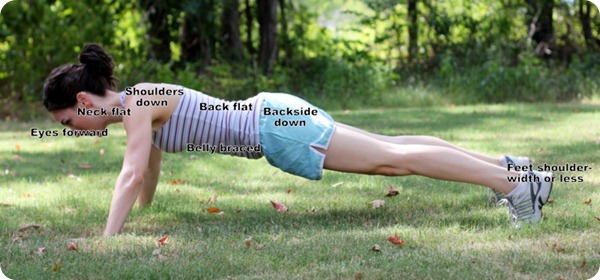
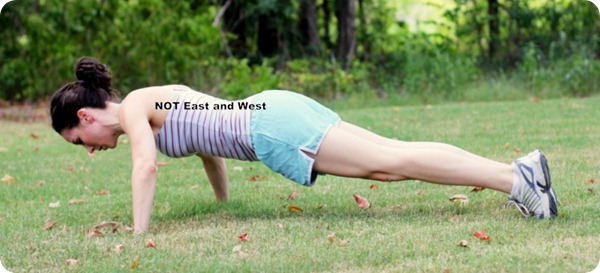
1. Do have correct push-up posture
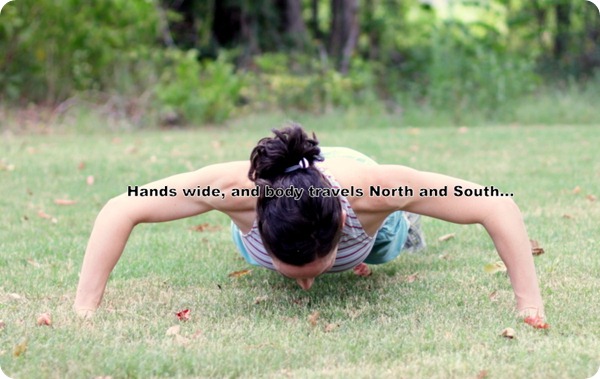
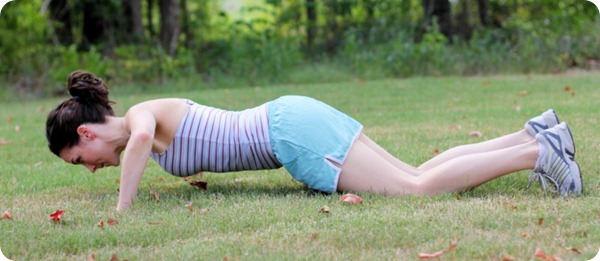
2. Do move in the right direction
Hard to tell in this pic, but if you look at my heels, you can see that I have rocked my body forward instead of lowering it toward the ground = NO.
And now the DON’TS:
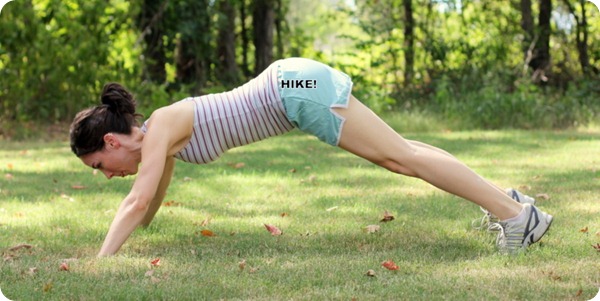
1. Don’t build a teepee! The most common compensation-method for someone who’s not quite ready for a toe push-up is to “tent” the body so that the hindquarters end up in the air. (Apparently, it’s harder than I thought; check out the way I’m sticking my tongue out in concentration). You probably won’t hurt yourself, but neither will you get the full benefit of the move.
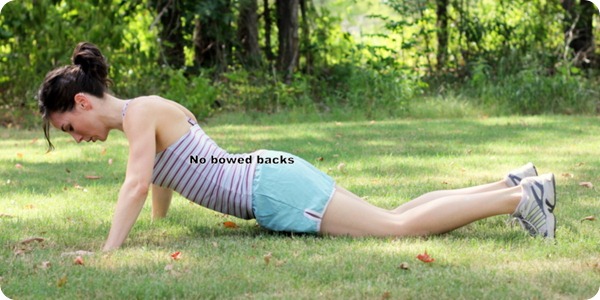
2. Don’t let your back cave in. This is the opposite problem and can put a great deal of strain on your back.
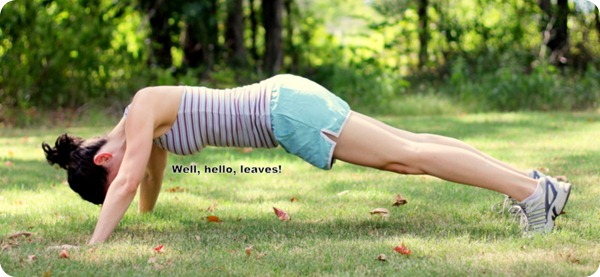
3. Don’t choose this moment to check for navel lint. Your neck should stay flat and in line with the rest of your body, and your gaze should be approximately three feet in front of your body.
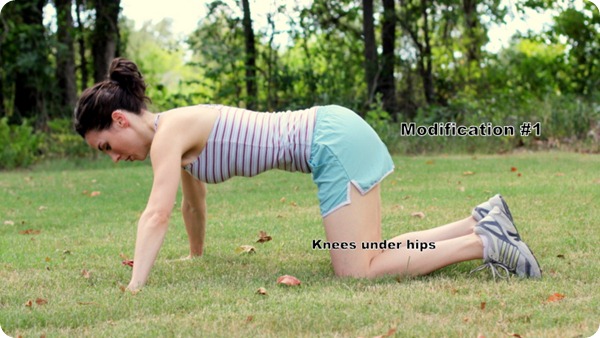
The really good news is that if, after reading this, a G.I. Jane moment still seems completely unattainable, you have options:
You won’t have to (or be able to) go down as far, and your abs will be supported by your hips/legs).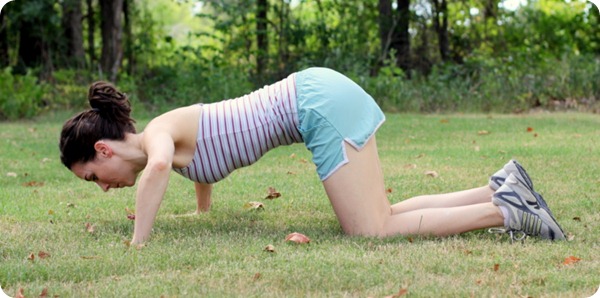
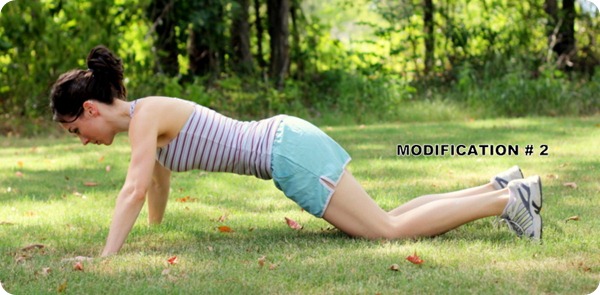
AND…
Second (modification) verse, basically same as the first, except that your knees are farther behind you, and your core must compensate to hold your weight.
In both modifications, the “DO’S” from above still apply, which means:
and “Yes” to vertical instead of horizontal movement.
And there you have them: a few simple tips to help you correctly execute one of the most versatile and effective (not to mention empowering…push-ups make you feel strong!) exercises out there. And—bonus!—no equipment necessary other than your own guns and a little willpower. Suh-weet!
Now, DROP AND GIVE ME 20!!!
Oh, and come on back tomorrow to see what I’ve got up my sleeve for Try-it Tuesday.

I love it! I’ve been working out with a trainer, so I get her reminding me to keep my butt down, but it is nice to see a great tutorial.
Modification #3. You left that part out? A person doing modification #2 w/laptop in front of them reading your tutorial, to make sure they are doing it right. ; ) Love, Me http://www.youaretalkingtoomuch.com
Well, yay for Abbies! : ) So glad this helped!
Thank you for Modification #1! As an over 50 female trying to maintain muscle strength this finally gave me the information I needed to do pushups successfully. Here’s hoping I can move on to Modifcation #2 after a couple weeks.
– another Abbie
P.S. I really enjoy reading your blog. Keep it up!
Didn’t she do great?! ; )
I love how you came back and added Della to the pics! Way to go, Della for helping out Mama!
Ironically enough, I used to teach yoga and hurt my back doing it. ; ) Never had any trouble with BP. But, then I am not very naturally flexible at. all.
Oh, I’m so sorry to hear that you hurt yourself in BP. : ( I would be so sad if I couldn’t do it anymore. And yes! Push-ups are the bomb! I’ll be doing more posts and variations later on for sure. Thanks for reading!
Cool! I am a yoga teacher and I LOVE holding plank for a minute at a time. I have a shoulder injury (from over doing it at Body Pump may I add) so plank is my push up. I can do wall push ups without aggravating my shoulder as well. Oh, oh and using a stability ball. Push ups are so much fun!