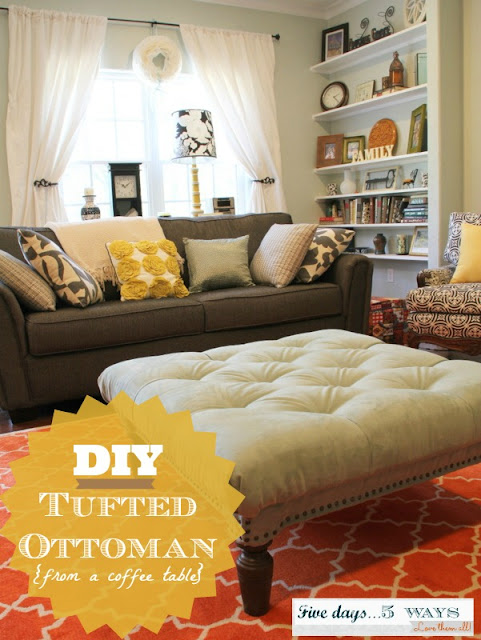
Want to take a junky old coffee table and turn it into something fab?
**If you’re considering giving this project a try, make sure you read my addendum at the end of the post with some suggestions for avoiding a few headaches I encountered. : )
I know it’s never a good idea to start a post with a disclaimer, so instead of a disclaimer, we’re starting with a…heads-up.
Here it is: this week’s project will be more of a before-and-after-with-some-helpful-pics than a hardcore tutorial. My only excuse for not having a pictorial blow-by-blow for you (boo! hiss!) is that I started this project before I started blogging (the nerve, I know).
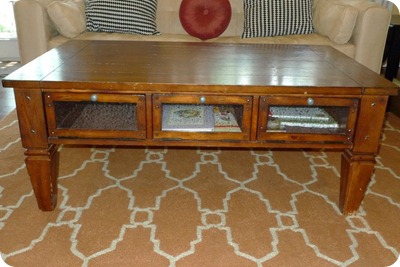
It was time.
(I think I would almost feel guilty for my inconstancy if not for the fact that she now resides in the living room of my bestie, Mandy…so, see? I found her a good home. End therapy session).
Hubby asked me what I wanted instead, and I hesitated, but not because I didn’t know. I did. I was just a little afraid to tell him.
So, I turned the question around, and, to my great surprise and delight, he started describing his vision of something low and large, without sharp corners…
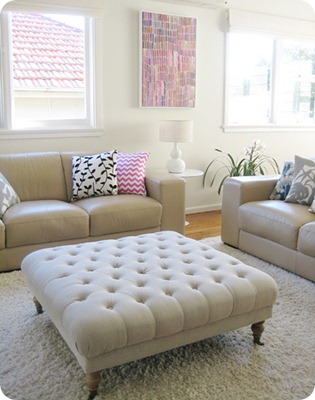
“Something like THIS?!” I interrupted (I might have squealed).
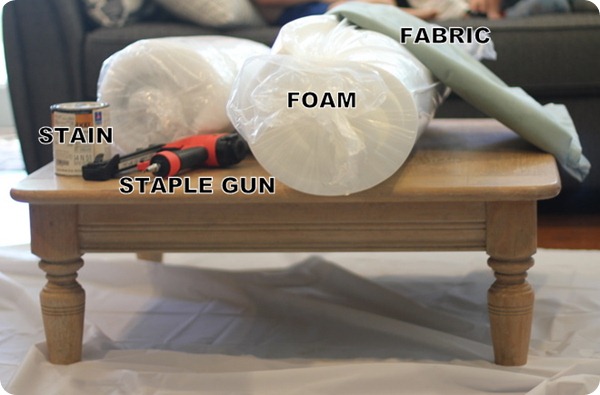
Do a price comparison on foam anywhere else, and you’ll quickly see this is a fantastic deal!
Here’s the part where the pics get a bit skimpy, but it’s also the boring part, so I’ll just break it down for you:
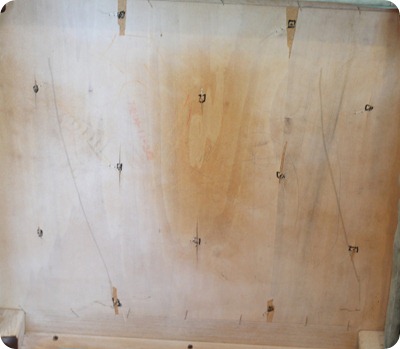
1) I decided on a twelve-button diamond tufting pattern, and my handy-dandy husband marked it out and drilled the holes for me. Here’s a view from the bottom:
2) I did the foam cutting/stacking bit that I mentioned above using spray adhesive to hold the foam in place (yeah, that didn’t work. at. all).
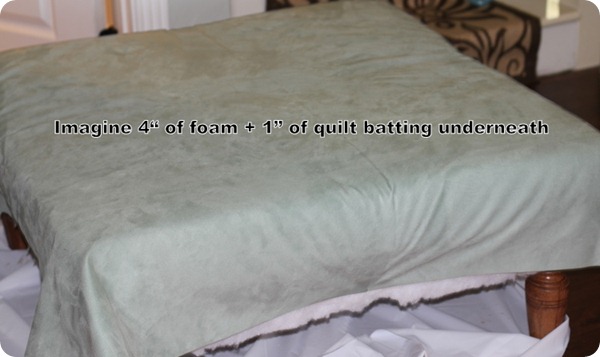
3) I wrapped the whole table-top in 1” quilt batting (that I also got @ Hob Lob with another 40% coupon; Tip # 2: if you’re as obsessed with bargains as I am, have no shame, and are willing to go back to Hobby Lobby 2-3 times in one day—so you don’t run into the same cashier twice…awkward—you CAN use multiple 40% off coupons!!!) and stapled the batting under the coffee table edges.
4) I draped the beautiful and practical (Durapella microfiber) sea-foam green fabric (that I found at Hancocks for 50% off the 50% off price) over the top of the foam.
5) I stained the legs, but they never got as dark as I wanted, so I went back and painted them with a sample of Cordovan Brown that I got from Lowe’s.
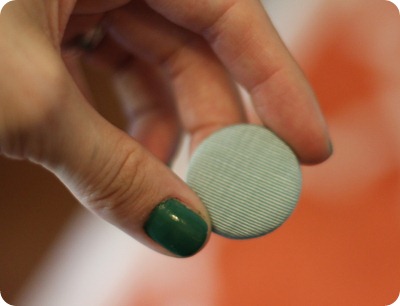
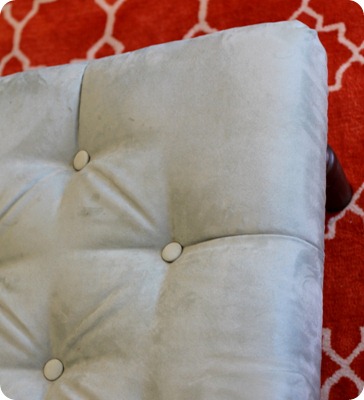
6) I then proceeded to cover my upholstery buttons (that I got at Hancocks for 40% off) with a scrap of Goodwill fabric I had that happened to match the rest of the fabric per-fect-ly (after discovering that the fabric that I had bought at Hancocks was too thick/inflexible to work for covering buttons)…
…then threaded them through the pre-drilled holes using a ginormous upholstery needle (jamming a 6” needle through 4” of foam is surprisingly therapeutic!), yanked them down to create deep tufts, and secured the thread to the underside of the coffee table.
**If you want a detailed, pic-by-pic tutorial of how to do diamond tufting, this one is great! I’m not saying that’s exactly what I did, but, umm, pretty close. Sure.
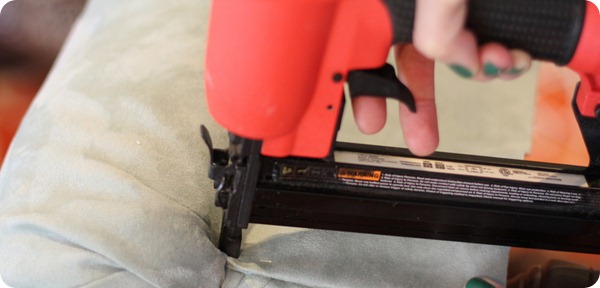
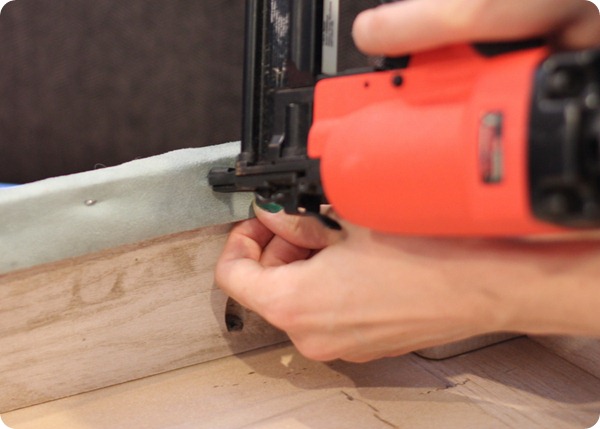
7) To simulate that, I cut my fabric into four 6”X40” strips (one for each side of the ottoman, since I didn’t have a long enough strip to wrap all the way around), and stapled them underneath the “poofy” top section, like so:
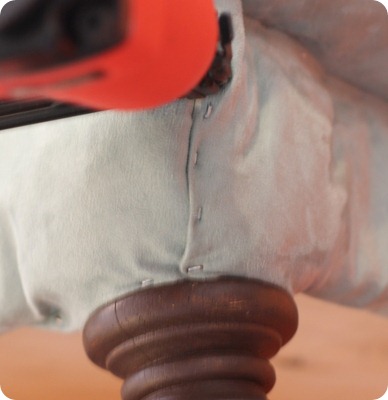
…then I folded the strips underneath and stapled them to the wood.
…and at the corners.
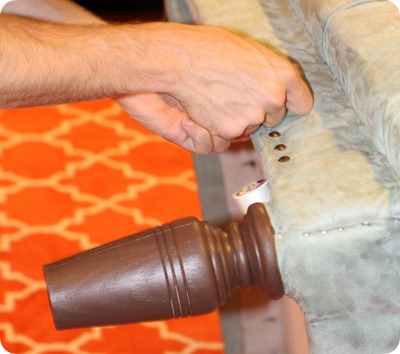
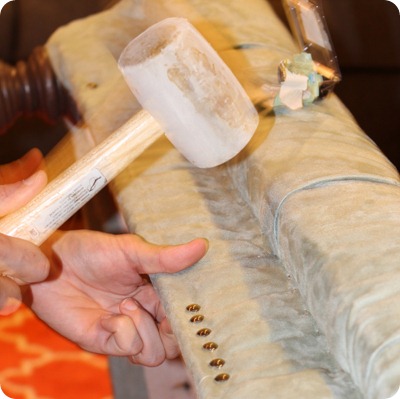
8) To cover all the visible staples, I added nail-head trim my hubby destroyed a bunch of nail-head trim tacks trying to do it for me (apparently that stuff wasn’t meant to be driven into aged oak covered in batting). All seemed lost (yeah, I was gonna throw the whole thing out on account of not having nail-head trim) until he got the brilliant idea to drill shallow holes for each nail-head tack to rest in before he hammered them home with a rubber mallet.
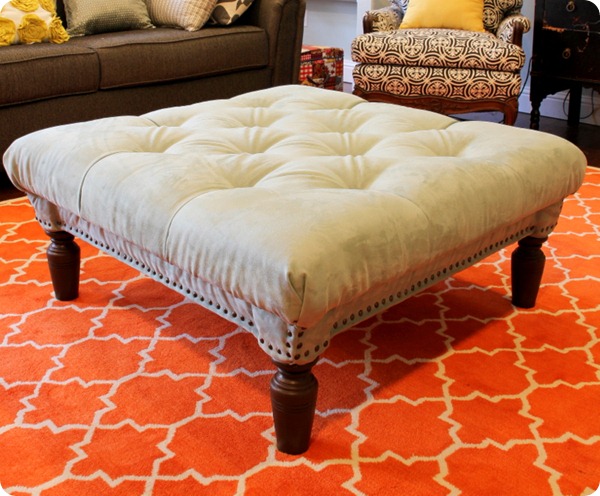
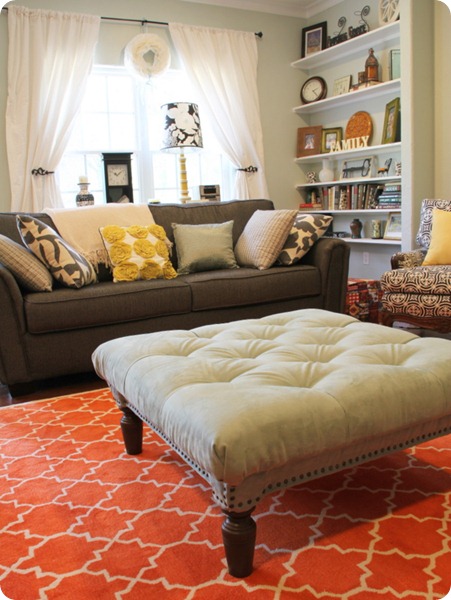
9) I turned it over, took pictures of it…
10) …showed it to you! (I was too close to an even 10 steps to quit).
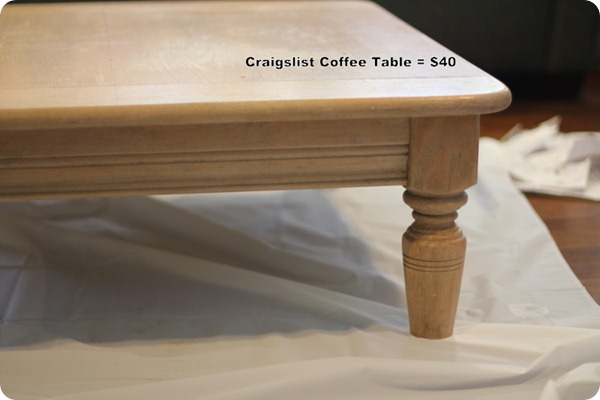
::Coffee table:: $40
::Foam:: $24
::Quilt batting:: $8
::Buttons:: $6
::Paint:: $3
::Upholstery thread + Needles:: $8
::Nail-head trim:: $12
::Fabric:: $15
TOTAL: $116
***THINGS I WOULD HAVE DONE DIFFERENTLY:
1) Used “real” upholstery buttons. The ones I got at Hancocks are simply too flimsy for the deep tufting that I want (one has already popped), so I’m eventually going to replace them with true upholstery buttons. You can either salvage these from another piece of furniture or buy them from an upholsterer either in person or online (More expensive? Yes, if you buy new. But worth it in the long run).
2) Hollowed out holes in my foam like Kristi did in the tutorial that I linked to above (seriously, if you haven’t read it, DO it! It will save you a lot of time/annoyance/mess-ups).
3) Used only 2” or 3” of foam. I love how cushy my ottoman is, but I think I could have achieved the same effect with 2” of foam plus an extra layer of batting wrapped around, and the tufting process would have been easier.
I’m sure there are other things I could have changed, but the tufting is really the biggest deal with this particular project, and I think I could have save myself some headaches if I had done what I mentioned above. If you have more questions, be sure to email me or leave them in the comments, and I’ll try to answer them.
I’m so excited about everybody that is giving this a try!
I would LOVE to see pictures of your versions when you finish!
Linking up with:


loved your tutorial! Just finished our ottoman! Definitely going to make sure I link your website to my blog so they know where I got the idea thank you again!
hi! i came across your tutorial, i LOVE it and agree i don’t like the “cube ottoman” look. i do have a question because its not exactly clear in your tutorial- but did you put foam and batting on the sides too? or just on the topside of the table? it looks like you stapled the fabric directly on the side… is this correct? thank you 🙂
crystal
Hey, I love your ottoman. I have made a couple myself andeach time I make one I come up with easier ways to make it, of cause combined with research. Your right, a thinner foam is much easier to work with and to avoid the whole button popping thing and tedious threading to make a tufted look, look up tufting with screws and washers, it’s awesome. If cause if you use a thicker foam , you will need to hollow a path in the foam. For thinner foams just screw the screw along with the washer right on the fabric all through to the wood and then glue your tufted buttons in. glue gun works best, but I would use the scrap material to glue on the back of the button so it can hold better onto the button. I love diys and of cause easier ways to do them. Chao!
How did you determine how much fabric your needed?
I gave a similar project a go, and I totally agree with the need for proper upholstery buttons. I used upholstery thread so the buttons stay on, but the tops have started popping off. You can see my DIY ottoman here https://turquoisetrix.wordpress.com/
Love this and I’m totally going to try your frugal tips! Any frugal tips for the nailhead trim? I’ve heard that’s a little pricey too!
I didn’t read all the comments but wanted to mention that a cheap way to get a thicker cut of fabric is a shower curtain. Plenty of fabric and made to recover from spills. Also, I had a rectangular table and used cushions from a discarded couch (made sure they didn’t smell) and sprayed them really well with Febreeze before use.
Oh I love it!! I made an ottoman out of a wood pallet, wish I would have known how to make it tufted. Here’s the link for mine: https://www.katiescrochetgoodies.com/2013/08/diy-pallet-ottoman-tutorial.html
I’m a “hand girl” too!!! Great blog, keep smiling 😀
I love this!
this looks awesome exactly what i was looking for in my living room.. i like a deal to and dont mind doing the work for exactly what i want.. can’t wait to try it out!
Nice blog here! Also your site loads up fast!
Great information shared..I am very happy to look at this site..appreciate for giving us nice info.Fantastic walk-through. I appreciate this website
Do you think it’s possible to recreate the ottoman using a pallet? Cuz if so, that would save some $ to put towards fabric. Also, do you think that an old school mattress egg create would work on top of pallet? Thanks for your help? Trying to create this the cheapest way possible but still want it to have the elegant appearance.
Wonderful tutorial. Thanks for all the info. You had me laughing at the way you crossed out the things that didn’t work. 😀
Ottoman looks great.
What a fun and functional site! Thanks. I just tufted a chair and am going to do a “fabric” button.
Very interesting. I hadn’t thought of some of these things before. Thanks.
Thanks for posting this tutorial. I have been wanting to make one of these for awhile.
This is a GREAT tutorial! I’m in the process of making a tufted ottoman from scratch! I have the base done and will be starting the tufting part this week (hopefully) and I am a little nervous about it. This helps so much! Great post!
I LOVE that! I have a coffee table I have been wanting to do something with. It’s got sharp corners and we want to make it more kid friendly. I am going to try this! Thank you!
Amazing! Thanks for the inspiration.
WOW This is awesome!!!!!!!
It’s exactly what I want and my daughter’s middle name is Emiline. Same pronunciation different spelling 🙂
Wow! I just think that this is fabulous. I would not have thought to do that with a cofee table. I have a round one that I could do this with (you think that would make it more difficult?). Have to give it a try. My husband is handy as well (and…he has nice hands too!! I’m a hand girl as well. It’s so telling, isn’t it???!!)
Love your blog! I posted a ptoject I did to your link party!
Linda
I love it, you inspired me. Can you tell me the dimensions of your coffee table? thanks
Awesome Ottoman!
By the way…Im following!
(You had me at “smilings my favorite” and “I love parentheses)
🙂
I am definitely going to try this…i’ve been looking forever and I haven’t found one that I liked nor something that would fit my decor. However, I had a question for you. I found a table on craigslist and it has a drawer in the middle. I would really like to keep that drawer to store remotes and little other things. What would be your suggestions so that I can keep the drawer and still keep the tufted look? I can’t wait for your reply!
LOVE the what I would have done differently..You never hear that..It’s really lovely..
Oh my gosh!! What a genius idea! Incredible!!! I love the way it turned out! AND…thank you so much for showing us your whole LR…now I am off to make a wreath to hang in the middle of my curtains!!!! Another stellar idea!! THANKS!!!!
gatheredinthekitchen.com
So elegant!!! How did you attach the buttons to the wood and make the fabric looks squared on top? Hope that makes sense!!! Thanks!!
i think you did a great job.i have a bench i am going to change and you have given me a really cool idea,Thanks!
Oh my goodness! How exciting! Um…I think I probably used approximately 1 1/2-2 yards of fabric (though I bought 3, and it was 60″ wide).
Sorry it took so long to respond. I’m sure you’ve already whipped it up. I would love to see pics!
great job
Love this! Saw it at 8am on Pintrest and by 4pm already found a 20 coffee table on craigslist and a staple gun from a friend. I am new to upholstery projects though so I was wondering how much fabric did yours take? My table is about the same size as yours was. Thanks for the inspiration!
i featured your tutorial come and grab a button xxx
https://twiggstudios.blogspot.com/2012/01/ottoman-envy.html
You are just awesome!!!! I so want to try this now.
So I am about to attempt this:) and I am trying to decide how to adhere the foam to the table if the spray adhesive didn’t work!
THANKS!!
How did you messure for your buttons & how many?
Love this! It’s going on my project list. Thanks for sharing!
Featuring on thursday at Bacon Time. 🙂
Love it! Need one in white leather without the tufts. After my long list of “have to finish first projects”, I will add that one. thanks for the inspiration and for sharing.
Diddie @ citicasita.blogspot.com
This is gorgeous! What great inspiration.
I just found a coffee table off craigslist and am going to give this a try starting today!
I’m going to make a lt blue turfed ottoman and this sure helps me a lot. Thanks for the info. :}
It’s actually a coffee filter wreath that I made by gluing a bazillion folded…you guessed it…coffee filters to a wreath form. LOTS of hot-glue and burnt fingers later, that’s what I ended up with. Requires zero talent. Just patience. Hope that helps! : )
okay…can i ask you about the wreath you have in the window? looking everywhere for one of these… ps the room is gorgeous. i’m learning all sorts of things around here.
somethingus.blogspot.com
This is so COOL! I am SO trying it!! And you are completely right… I feel like a fool whenever I go back into Hobby Lobby and the same person is there… but that place is like a drug… I never leave when I plan, even when I set an alarm… It will probably be the death of me AND my bank account, because now all of my accessory furniture is going to be tufted!!
Oh cool! I didn’t realize this was your living room that I pinned several months ago for my own living room inspiration! 🙂 The link on the picture from Pinterest was broken, so I could never get back to see where it originated from! I just always figured it was a professional picture from Houzz or something….that’s how good it is! Anyways, I saw a pin of your inspiration ottoman on pinterest, clicked on it, and low and behold! There was my living room inspiration! 🙂 So yeah…all of that to say…I love your living room…and while we are in the process of redoing ours, I keep referring back to yours!
Oh…and you did a GREAT job on your ottoman! All of the times I’ve seen that picture, I never would have guessed it was DIY’d! 🙂
This is really a great idea. It turned out great!
This is SERIOUSLY awesome! I am blogging about your post – I hope that is ok! You will be linked! I hope to try something on a smaller scale in my TV room in the near future….
I stapled the upholstery thread to the underside. I still had a couple pop off because my foam was so thick, but it wasn;t because of how I attached the thread. The buttons were just too flimsy. I’m going to replace mine with upholstery buttons. Hope that helps!
Exactly how did you attach the buttons to the under side of the table so they wouldn’t pop off?
OMG that is great!! I love Goodwill and such for great deals. Bought a bunch of furniture for my son’s college apartment and refinished some pieces that needed a facelift. Found a kitchen table for the trash from a neighbors front curb. I LOVE this ottoman, I am now on the hunt for a coffee table and making it myself just like you. Thanks!!
I love love love the project just what I was looking for. BUT where did you get the orange rug. I have been searching for one to go in my living room. thanks
Love it love it love it!!! I was just thinking about getting rid of the coffee table that somebody gave us some time ago (got rid of it, obviously) and we took it, because hmmmmm – just in case we would need it! Hehe! And it needs bunch of refinishing work and stuff, so now I know what I am going to do with that ugly Mr. Table! Thanks for the inspiration!
God bless
Alya
Thanks! The rug info is in this post: https://www.fivedaysfiveways.com/2011/08/move-it-monday-living-room-revealthe.html
Love this!!!! Where did you get your rug from?? Love that too 🙂
The specs for it and other things in my living room are here: https://www.fivedaysfiveways.com/2011/08/move-it-monday-living-room-revealthe.html. Hope that helps!
That table is amazing and I absolutely love that rug! Any chance you’d reveal where you got it?
Something you might find helpful then…find something someone has pinned on Pinterest, click on the pin and look at the bottom left of the screen…you should see “also from fivedaysfiveways…” Click on that and it will take you to a page of everything people have pinned from your blog. Very helpful and fun to watch people pinning ideas from your blog! So much fun!
Ooooh, yeah., I guess I could do that couldn’t I? : ) I’m reeeeally new to Pinterest, can you tell?
Thanks for following! I know for sure I pinned your daughter’s nursery. I would have to go back and look for the others, but you can check out my pins as well! (There’s a link to my pinterest under the followers box.)
Thanks again!
Oh, and I’m a new follower. And I was wondering what other pins had come from my site out of curiosity?
Read it and loved it! Well done you!
WOW! Amazing to say the least.. I am so like you.. hobby lobby coupon…lol love it!
thank you so much. i really appreciate it!
From ebay. It’s the Pottery Barn Moorish Tile rug in Clementine if you want to search for it, but I don’t think you’ll find it b/c I bought it quite a while ago. Here’s an similar alternative, though: https://www.garnethill.com/bogart-flat-weave-wool-rug/bedding-home/rugs/flat-weave/17031 . Hope that helps!
Hey girl,
I love love loveee the ottoman, but where did you purchase that rug??
Thanks! It’s actually pretty exciting to know that *I’ve* inspired THE Thrifty Decor Chick! : )
Wow!! OK, I have a round table that I’ve been planning to do the exact same thing with and this has me inspired!! It’s just beautiful!
Look at you go! I can’t wait to see pics (don’t forget to read the bottom of my post for what I would have done differently and to read Christy’s awesome tufting tutorial that I linked to…it’ll save you some headaches! : )). So excited for you!
Got the table, foam and fabric..(yay!) hubby is even excited and is going to shorten the legs for me and map out the diamond pattern and drill the holes..excited to be starting on the project tomorrow! I’ll be sure to post pictures when it’s done!
Ow and I got some more fabric to make a few matching pillows for on the couch as well, so that should bring it all together nicely (i’m rambling, but that’s just because i’m excited :))
Thanks! I got the couch at Ivan Smith. The brand is Corinthian.
looks great – thanks for the tutorial. can i ask where you got your couch? i like it. tarynmerkley@gmail.com
: )
You’re welcome! Thanks for reading!
Wow, unbelievable! I’m looking to make a slipcover for an older ottoman that could use a bit more foam. Glad I found your tutorial. Thanks! 🙂
Official bloggy BFFs! I’m so there!
I can’t wait to start in on Emmy’s cousin. 🙂
Thanks so much, Amanda! I’ll be sure to grab a button! Happy Monday! : )
This is truly awesome! I’ve featured this post on Craft Gossip here:
https://homeandgarden.craftgossip.com/diy-tufted-ottoman/
If you would like a “featured by” button, you can grab one here:
https://homeandgarden.craftgossip.com/grab-a-craft-gossip-button/
Thanks! And that’s a great idea! It would actually be a pretty darn simple
project without the tufting.
Glad I was able to help you prove your point, Chellieke! : ) I would love to
see the finished product!
Thank you! And whirl away! What have you got to lose, right? : ) Thanks for
visiting, and I would absolutely love to see pics if you decide to do it!
I am visiting from French Country Cottage. Your ottoman looks ab-fab! I have a coffee table from 1990 with a marble top which only sits on the frame. I have considered giving this a try with a removable top, in case I want to put the marble on again sometime. (Ha!) The table frame is really pretty, and now I am inspired to give this a whirl.
THANK YOU! I’ll be sure to add it to my “featured” list!
just a quick note to let you know that i am featuring your nifty ottoman today on fridays unfolded…have a wonderful weekend!
alison
I’m so happy you posted about this project! Everytime I start something like this I see my husband thinking..how is this going to turn out. So when we were talking about changing some of our furniture the “cheap” (or as I like to say creative and original) way, I told him I wanted a turfted ottoman..His first comment was “you aren’t going to do that yourself, are you?” So I showed him your finished product and told him that was a DIY as well and said “Yes I am!”
I already got me some foam but haven’t found the perfect table to use yet, since all the tables I’m finding are too tall for my liking..Anyway, once it is done, I’ll be sure to share with you!
This is a great tutorial! I had been pondering doing this (without the tufting) to a long rectangular coffee table or onto plywood and attaching it somehow to cubby shelves to make a bench for under the diningroom window. I love how it came out!!
Why, thank you!
Doooo it! I added a few deets about the tufting process to the end of the
post that you might want to check out if you decide to go for it! Thanks!
Thanks!
Thank you!
Thank you so much for the feature! I grabbed a button! So cool!
Ooooohhh, Alissa. I do believe you and I need to be bloggy BFFs! I’ve been
*waiting* for someone to bite on my GG reference, and you’re the first.
Yessss! Thanks for subscribing. I’m doing the same to your awesome site. I
love your deals (and your use of words like “affinity” ; )). Oh, and I
entered your giveaway. Any way you can make the winner less *random* than
usual? Ha!
Oh, and I added some deets at the end of my post about making the tufting
process easier/better that you might want to check out before you start
creating Emmy’s cousin.
Have a good one, girl!
You’re more than welcome, Ashley! I added a few details to the end of the
post about the tufting process that should help with the tufting process if
you decide to do it. Oh, and your site is fantastic. Had fun browsing for
a while the other night!
You’re welcome, welcome, welcome! ; ) It makes my day that I’ve helped
people figure out how to do something they wanted to! I added a few details
to the bottom of my original post which should help with the tufting
process, so you might want to go back and check that out!
AWESOME, Taunya! Check out the addendum I just made to the post before you
get started. I made a couple of notes on things that I think are important
about the tufting process to make it easier on you! I’m so glad you are
going to do it!
off to look for a table on craigslist!
I absolutely, positively LOVE this. You have inspired me to do this. I love a tufted ottoman but the prices are YIKES! Thank you, thank you, thank you!
Completely amazing. And officially first on my to-do list is to give Emmeline a long-lost cousin. I’m officially subscribing by e-mail so I don’t miss that big living room reveal… It has absolutely nothing to do with your affinity for the residents of Stars Hollow. Nothing at all.
This came out awesome. I will be featuring it at my Sizzle into Summer party that opens tonight at 8pm EST. Please stop by and pick up an I’ve Been Featured button. Thanks.
Absolutely stunning!
Wow, this turned out really cool!
Awesome job and tutorial as well. This has me thinking if I should attempt this on mine as well.
Wow, that is truly amazing! You did an absolutely fabulous job!!
RIGHT ON!!!!!!! I LOVE your ottoman and have totally been thinking about doing one myself… you may have further inspired me! Thanks for the tutorial!!!
Thanks! I’d love to see pics when you finish!
This is amazing!! I can’t wait to try it with two coffee tables I have lying around!
Great work!
Thanks, Laura! Visited, followed, AND entered. Thanks for the invite!
Thanks, Ellen! And I got the rug on ebay: it’s the Pottery Barn Moorish Tile
Rug in Clementine, but it was a little while ago, and I’m not sure it’s
still around. : /
Omigoodness! I hadn’t even seen it! YAY! Thank you for heads-up!
I love this! I also love your rug- where did you get it?
You’re on apartment therapy re-nest https://www.re-nest.com/re-nest/before-after/before-38-after-craigslist-coffee-table-turned-tufted-ottomanfive-days-five-ways-151532#comments
What an absolutely adorable DIY! Well done.
I hope that you will stop by and enter my giveaway.
Happy Monday!
Thanks for the enthusiasm, Meg! I don’t feel like I deserve it, but I
certainly do appreciate it!
Amy,
I would like you to know that the moment I read this comment, I went
upstairs and told my husband that you said this and that it totally makes my
day when people tell me I’ve somehow helped them to figure something out.
Thank you! Send me pics when you finish!
Aw, shucks! (Scuffs toes against carpet in sheepish embarrassment : )).
I am in awe.
AHHHH! It looks amazing! I have had a coffee table sitting in my garage for three months, waiting to be upholstered….but I’ve been chickening out because I couldn’t figure out how to make the legs look tailored. Your post just gave me courage! I’m going to get my foam tomorrow….
Augh! Augh! Augh! I LOVE this! It’s beautiful and your room is gorgeous. The pillows, the lamps…wow, I love it all. The ottoman is such a wonderful piece and now I want one! Love it!
Wow, it’s absolutely gorgeous! You smart cookie, well done.
I would be happy for you to try this, Farah! I’m glad you found me!
Well, thanks, Pinky! Aren’t handy husbands the best?! And, wow! 43 years! Congratulations!
HI Abbie… what a great project, simply inspiring… how smartly you turned that table into such a lovely Ottoman…great job…Soon I am going to try one for me… hope you dont mind …
Feel very happy if you pay a visit to me at
https://craftaworld.blogspot.com/
Love
Farah
THANK YOU! : )
This is absolutely amazing!! I am amazed!!! You did an incredible job! Sharing this on Facebook~ thanks for sharing at Feathered Nest Friday! 🙂
Thank you! And I so appreciate the feature. Oh, and it would totally work on any shape table with practically any leg length (I think it would love fabulous in a round or oval version), since you can shorten them like we did. I would love to see pics if you find what you’re looking for!
Thank you so much for the feature, Cheryl! What a fun surprise! I hope your weekend is great as well!
this turned out BEAUTIFUL!!!
Thanks for linking up! I featured your post in my wrap up https://tidymom.net/2011/great-ideas-5/
Have a fabulous weekend!
This looks great! I love it! I featured it on my Friday 5 and hope I can find a craigslist table to try it on! Have a good weekend!
http://www.modernwivelyhood.blogspot.com
Thanks! I would love to grab a button! I so appreciate the feature!
I LOVE it!!! It is so beautiful, that I want one! I am featuring it tomorrow morning on my blog, you can stop by and grab a button if you want. 🙂
https://suburbsmama.blogspot.com/
The wall color is Sherwin Williams Sea Salt. And I’m definitely interested in the feature. I’ll message you!
Abbie, the ottoman looks great, and your entire living room is amazing! I’d love to add it to the inspiration galleries on my site and include you in a feature post. What is the wall color? Let me know if you’re interested! Oh, and I’m a new follower!
Sure, Jessica. That will be $5,000. Ha! Thanks for the compliments!
We hand girls gotta stick together. Thanks again for hosting! : )
Yay! So glad you found me, Chelsea!
THANK YOU! You have no idea how flattering it is to hear that something I put effort into and my three kids climbed all over looks even remotely magazine-ish. Made my day!
Thanks! It seems to be a big hit. The Moorish Tile Clementine from Pottery Barn if you want to chance an ebay search.
This is great! And I LOVE your rug!
That is just gorgeous!! What an incredible job you did and what a great tutorial too! That last pic looks like something out of a magazine. 🙂 Thank you so much for sharing this with us at Inspiration Friday this week!
Vanessa
oh my goodness. love this!! and you’re blog is cute 🙂 found you through “what i love wednesdays”
wonderful job and excellent tutorial…love how your ottoman turned out and so happy you linked up to fridays unfolded…and me? i’m a hand girl too…;)
umm will you please make me one? then ship it to me? that would be great, thanks : ) i LOVE it!!!!
Oh, and your site is just lovely! I think wedding planning would be one of the most nerve-wracking and fun jobs ever!
Oh, and your site is just lovely! I think wedding planning would be one of the most nerve-wracking and fun jobs ever!
Why, thanks, Jacin! : )
Oh, I hope I have, Jennifer! You can DO it!
Hmm…That’s a good question b/c I definitely did it in stages (which, I think, may also be the answer to your kiddos question…you have to assume you won’t get much done at one time). I think it probably took something like 10 hours total, but none of that was too harrowing.
Stefanie, I’m such a dork. As soon as I saw your name, I ran upstairs and told my husband, “Mrs. Limestone left me a comment!” (He’s heard enough about you that his eyebrows went up in at least a very pleasing facsimile of surprise and impressed-ness). Thank you! I’m so glad you like it!
Dern babies. Just kidding. I’ve had three, and I can definitely relate to prioritizing, well, life, much less superfluous furniture projects, when you’re pregnant.
Do it, do it, do it! (and then send me pics! : )).
Thanks, Julia! I loved your a la mode dresser!
Thank you!
Thanks, Michelle! It was my pleasure to link up! Oh, and it was pretty simple, and the most complicated part was the tufting, but definitely doable!
Thanks so much, Ali!
This is AMAZING!!! Great job! I’m your newest follower 🙂
W-O-W. You did a great job on this! It doesn’t look too difficult, but the tufting scares me. Thanks for linking up at DIY Thrifty Thursday @ http://www.thrifty101.blogspot.com
Yep, pretty awesome deal! Looks fantabulous!
I’m super impressed and dying to reupholster a piece:) Yours is just great!
That is truly beautiful! I am so very impressed!! Thanks for the tutorial, I just might have to try something like this.
That is so nice! I’m wanting to do this to my old coffee table as soon as I get this baby out of me 🙂
I know I already told you this but it looks fabulous. Great tutorial. And I love how you are styling the living room.
Impressive! So how long did this project actually take you? And how in the world do you find time for all this with 3 beautiful kiddos running/ crawling about?!?
I love how this turned out! I have a large square coffee table in my living room that has seen better days and I’ve been contemplating doing this for years…scared to take the leap! Maybe you’ve give me the confidence!
whoa, that is seriously amazing!!!
Thanks for looking, Cassie! Your projects were awesome! Great party!
Thank you, Laurie! I’m so glad you came to visit!
You’re so welcome! Thanks for stopping by!
You’re welcome, and you should totally do it! Oh, and your DIY Ikat fabric was absolutely fantastic!
Oh, and I saw your fabric post, and I wanted to say that I LOVE Premier Prints. They’re my fave go-to brand for funky/cute prints on the cheap!
Thanks! And the rug seems to be a favorite. I might need to get a little jealous.
that looks amazing! the whole room is gorgeous- love the rug and accents!
BEAUTIFUL! Thank you for linking to Handy Man, Crafty Woman Wicked Awesome Wednesday!
You did a really amazing job. Thanks for sharing at my Sizzle into Summer party.
Your ottoman turned out beautiful, I never would have known it was DIY. I have been playing around with the idea to do this to my coffee table for awhile, but have not worked up the nerve….Thank you for the inspiration!
You are awesome. Love the coupon idea and and your rug.
Dooooo it! It’s my favorite pillow. I thought about knocking it off, but for $20, it would be a total waste of my time.
I was a little intimidated by tufting at first too, but it turns out that it’s really not so bad after all. : ) Thanks for reading!
No problem, Kim! I’ll change it out. I think I just missed it (although it was probably smacking me in the face!). Thanks for visiting!
Wow, that is quite impressive and I love your family room, too. Thanks so much for joining the party. I do wish you would use the wow us Wednesdays button if you can instead of my blog button. Love the wit in your blog post, too.
This is so amazing!! I LOVE IT!!! You did great! And I love the yellow rosette pillow (FROM TARGET) I want that so bad but have no where to put it!! I will find a place soon though and go get it! 🙂
Wow! That is very impressive, Lady. I love tufted ottomans, but can’t imagine tackling a tufted project. It turned out superb and love the color with the red carpet!
Thanks, Michelle! And yeah, whenever I do a project on the cheap, I think, Hmm…I could sell this for twice what I spent, but then I’d never find something just like it for the price, and then I’d have to make it again…Nah! ; )
Oh, and the rug is from Pottery Barn (a very rare splurge for me…though I got it on ebay). It’s their Moorish Tile rug in Clementine…don’t think it’s still around too much, though.
Wow! You seriously did an amazing job! Good for you! You could turn around and seel it on craigslist, but really it’s too pretty to give away 🙂 I love Craigslist for finds like this. I am so impressed with what you did with it!
By the way, I love the rug!! Where did you get it?!?
Emmeline, it is! Seriously, that’s a great suggestion! (Do you watch Anne of Green Gables? Cuz that’s what I totally think of when I hear Emmeline : )). I’m so glad you’re enjoying yourself here, Andrea!
Absolutely, Jackie. It’s Sherwin Williams Sea Salt…hopefully you can tell in the pic, but it’s pretty much the perfect hybric of light blue/green/gray.
That is so lovely – name it Emmeline! I am really enjoying your blog 🙂
Can you share your living room paint color?
Thanks, Jessica! I’m so glad you liked it! Please send me pics when you knock this one out! Cheers!
Welcome, Kristi! It was my pleasure to mention you. Thank YOU for taking pics and giving good instructions. And thank you for the writing compliment. I like the projects, but I love the writing! Oh, and thank you so much for the feature! I am going to proudly display your button on my blog as soon as I post this comment. : )
So glad you found me, Melissa! You could totally do this too! And I know how you feel about the sharp corners business. I have two boys, and they seem to have a knack for finding sharp corners wherever they go.
This is totally amazing. I’ve been wanting to make one of these but had yet to find a tutorial. Love this, congrats on such a great project!
I followed a link over from my Sitemeter (thank for the mention, by the way), and I’m so glad I did! Not only does your ottoman look fabulous, but I absolutely love your writing. You had me cracking up! Anyway, I think this is such a great idea that I’m going to feature it on my Inspiration Files. Your entire living room looks amazing!
Wow! That looks awesome! I would love to have something like that in my living room! My poor little guys are always hitting the hard edges of our coffee table , it hurts my feelings. 🙁 I love your living room! – I also LOVE your blog! I just found it yesterday! 🙂