I’ve mentioned before that I am not exactly the world’s most techno-savvy chica. In fact, I might go so far as to say that I have a technological black thumb. My husband, who is the polar opposite (and thank goodness considering that he provides for us with his mad computer programming skillz), often marvels at my ability to make something stop working that was doing just fine before I got ahold of it.
The thing is, I’m not dumb. In fact, I’m generally pretty quick about academic things and have a good memory for details. But there’s just something about technological info that makes my brain turn to mush. Words are my friends. Gadgets…not so much.
So! All that to say that when I find something that works well for me that I can navigate easily on my own, I tend to stick with it.
Google’s free photo-storing/editing service, Picasa, is one such technological godsend. And even though I’m sure that I do not use it to its fullest potential, and I in no way claim to be either a particularly proficient photographer or editor, I am still going to share with you a few quick/easy Picasa tips that have made my photo-editing process simple and relatively quick.
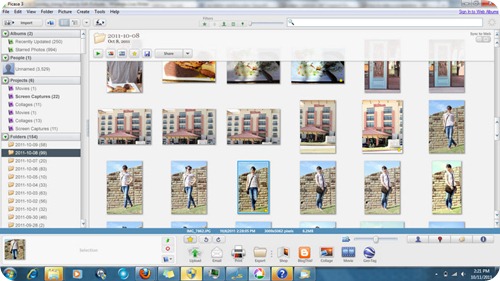
1. Once I’ve loaded a particular round of my pictures into Picasa from my SD card, I scroll through them in library view, which looks like this:
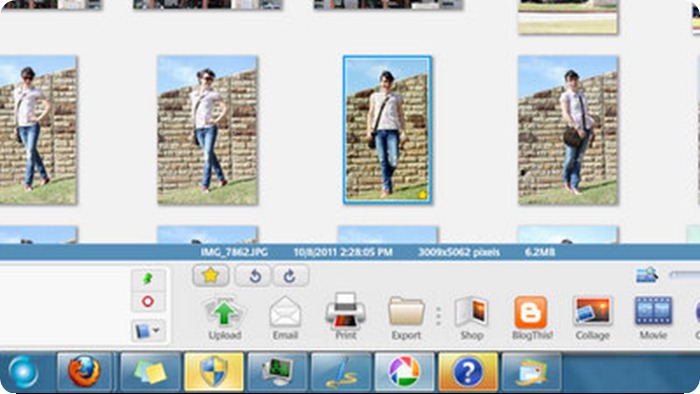
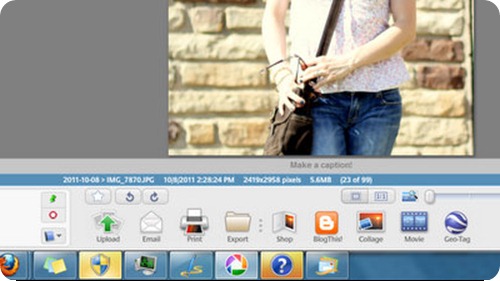
I add a star to mark which ones I want to edit using the easy little button from the toolbar at the bottom (right below the “IMG_7862.JPG”):
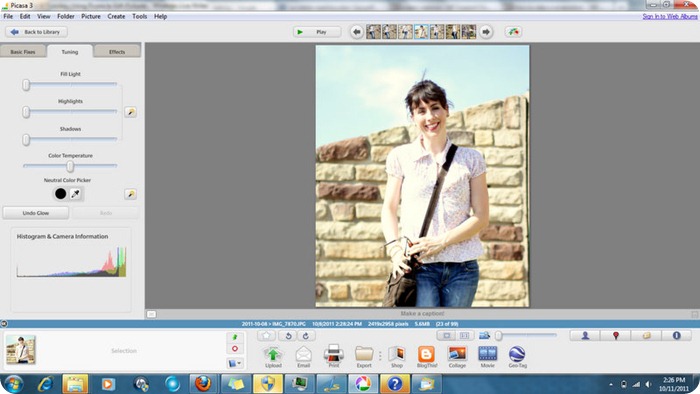
2. I edit my photos using the easy-peasy tools which pop up when you select a photo:
You can see them there to the left: 1) Basic Fixes (cropping, retouching, adding text, etc.), 2) Tuning (fill light, color temp, shadows, etc.), and 3) Effects (b+w, sepia, and, my favorite, glow…among others).
My photo-editing process almost always looks like this: crop, add some fill light/highlights and some shadow to make the color pop, a little warmth (unless the pics were taken in my kitchen which tends to make everything yellow already), and then a very little bit of the “glow” effect, which does just what it sounds like. That’s it.
Nothing fancy.
But it does take a raw photo from this:
To this:
Better, no?
3) I crtl + select a group of photos and, using the Export button, send them to a particular folder, which I name right there in Picasa. As you can imagine, I have a folder for each of the blog’s themes as well as Thrifted or Grifted, Secondhand or Bare Bottom, etc. I can then easily yank them out of the folders at will as I’m writing posts.
See the Export button with the folder symbol above it? Also, notice that you have several plug-in buttons you can incorporate, including a “BlogThis” button (which I don’t use since I write my posts in LiveWriter) and a FB button that I apparently don’t have in this particular version on this particular computer (note to self: reinstall that while hubby is looking over your shoulder…otherwise he’ll never believe that you actually managed to screw up something so simple : )).
4) Want to know one of my favorite features in Picasa? Super easy collage-making. You’ve probably noticed that I use the tar out of this feature. Whether it’s the round-up of goodies for The October Giveaway, an introduction of my projects when I write a guest-post, or just a silly project like the one I’m about to show you, I haven’t found much else that takes a group of random shots and immediately gives it a cohesive feel.
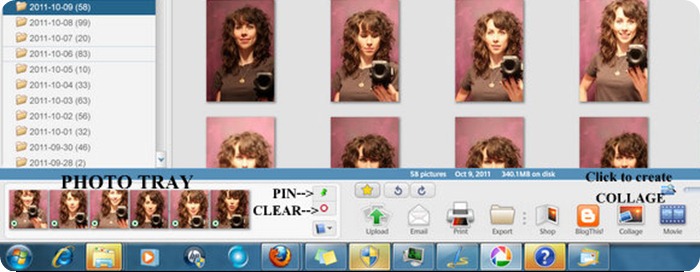
To make a collage, all you have to do is select a group of photos you want to combine. Each time you click on a particular photo, it will place it in the photo tray on the bottom left of the screen. To keep it there, you simply click the green “pin” button. Each photo you pin will be included in your collage. You can also use the “clear pin” button (red circle) if you decide you don’t want a particular photo anymore.
Once your photos are chosen, simply click the “collage” button and proceed with your collage-creation.
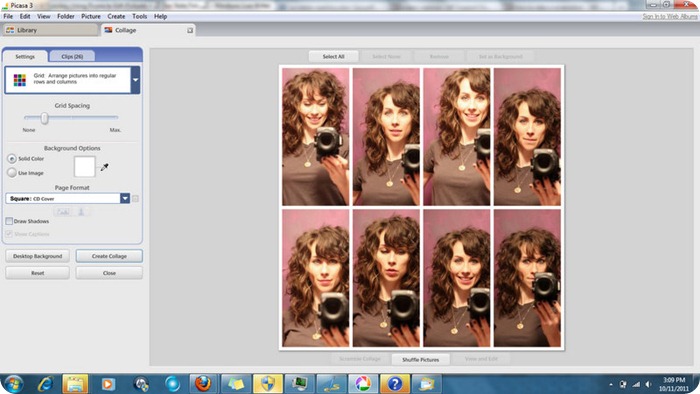
From this screen, you can change the shape (this one is square: cd cover), add/remove photos, add grid-spacing (those are the white lines in between the photos, which I love the look of), and just generally make your collage do what you want it to.
Once you’ve got everything to your liking, click “create collage,” and you’re done! Picasa treats your collage like any other picture, which means you can go back to your photo-editing options and do everything that I mentioned above: cropping, tuning, and—my favorite—adding text.
And this is what you end up with: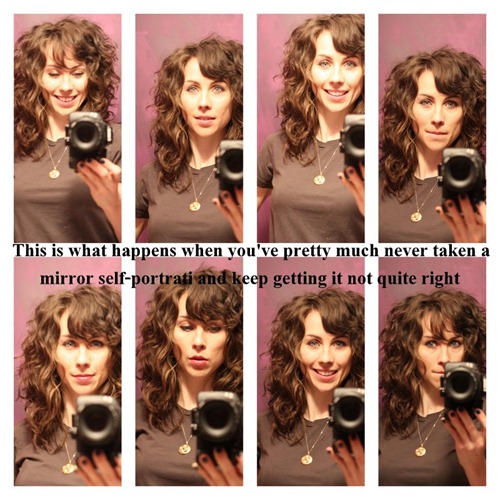
Yup, I know I’m a dork.
Not only do collages work great for blog-posts, but they would make for fantastic gifts, keepsakes, or even portfolio aids to display your work.
As I said, I know I’m missing a lot of the features that I could be taking advantage of, but for now I will stick with what I know and be grateful that even I, in my technological ineptitude, can create photos that I’m happy enough with so that I don’t feel like I’m torturing you guys to make you look at them.
I hope this has been a helpful little Picasa tour and would love to hear about any tips that you expert Picasa users can offer.
And for the non-Picasa-users…I’d love to know…what are your favorite photo-editing programs or methods?
See you tomorrow for Wardrobe Wednesday. I’m especially excited about what I get to show you!
P.S. Don’t forget that Thursday is Round 2 of the Five Things Thursday linky party. Thanks so much to everyone who took the time link up last week. I had so much fun browsing your lists!
This week’s theme is: Fall Fun.
But, if you don’t want to use that theme, feel free to link up 5 of whatever pops into your mind.



I’ve used picnik, but only the free option, which, with the way my internet is, means quite the chore to add only 5 photos at once. I did like all the fun extras, though…I’ll have to give it another shot!
Hmm….no. I mean, maybe I’m misunderstanding about the filing thing, but it just files all of my stuff by date and then the file names that I give it underneath. Nothing too wonky.
And strangely enough, Picasa now has a link to Piknik in its main editing options.
I’ve used Piknik some and like all the options, but I’ve only used the free option and having to upload 5 pics at a time is such a pain in the tushy that I couldn’t get very happy about the rest of the options.
Okay, I have a question: I stopped using picasa a couple of years ago because it majorly screwed up my filing system. All of my images are filed chronologically, and picasa just kind of stuffed them in wherever it wanted to. Any problems like that?
I use picnik.com – love it!
Very interesting! I don’t have a blog, but love the photo tips. I really love picnik (www.picnik.com). Its free (to access all the features you can pay some $), but you can do a ton of stuff w/ the free features. My fave is the cross process – gives your photos a very cool vibe 🙂 You can also add fun funky text too. You can just upload one pic at a time to try it. Lemme know if ya’ try it 🙂