Several months ago, as I was trolling the linky party circuit, clicking around through the pics that caught my eye, I noticed a trend.
Uber-cute crafts.
Great pics,
Fun writing.
And it all kept taking me back to the same place:
I’m not exaggerating one teensy bit when I say that I haven’t seen a less-than-stellar post from these ultra-talented girls, and so it is with great pleasure that I say: “Take it away, Nat and Holly!”
………………………………………………………………………………………………………………
Hi! We’re Nat & Holly, sisters and best friends living 462 miles apart. We only get to see each other a few times a year, so in the meantime we share everything on our blog, My Sister’s Suitcase.

We’re excited to be here for “Try-It Tuesday!” Abbie is a sweetheart, and she has been so encouraging as we are getting our name out there in the blog world.
We are thrilled to be sharing a super easy tutorial with all of you today! This project takes me back to my summer camp craft days, but in a good way… haha!
I saw some adorable tea towels that Heather at Setting for Four made by tracing an image with a plain black Sharpie! I thought, hey maybe that would work with a white t-shirt. So I busted out these “berry sweet” t-shirts {made with sharpies and fabric markers.}
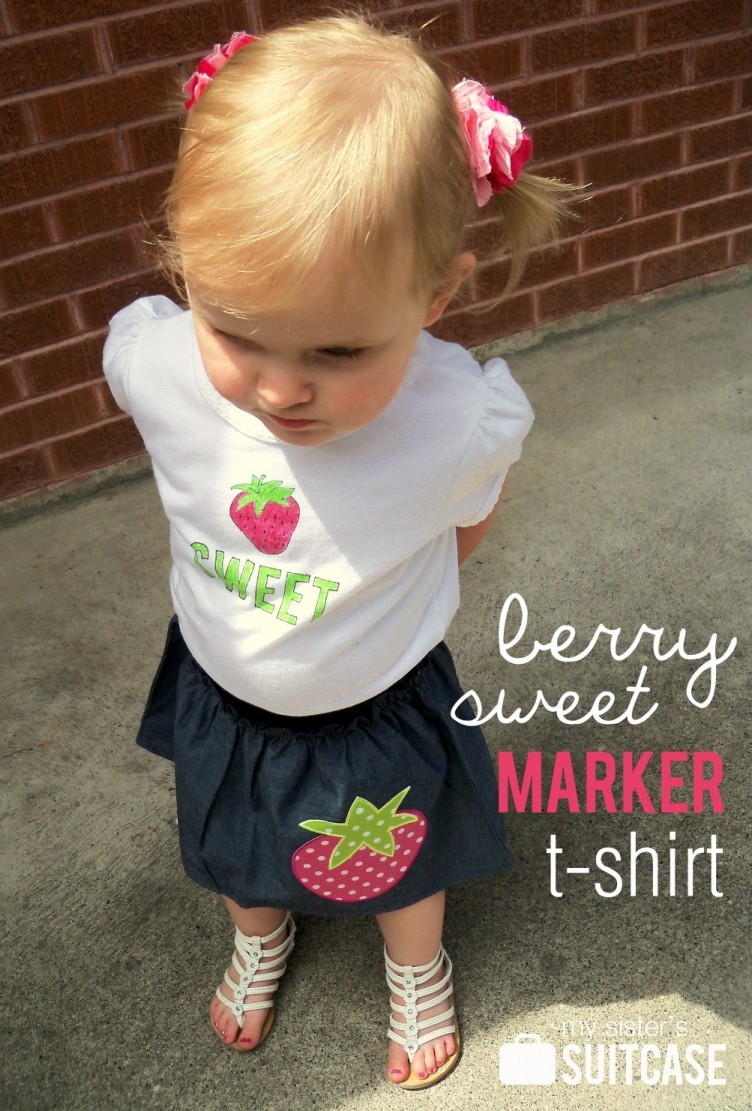
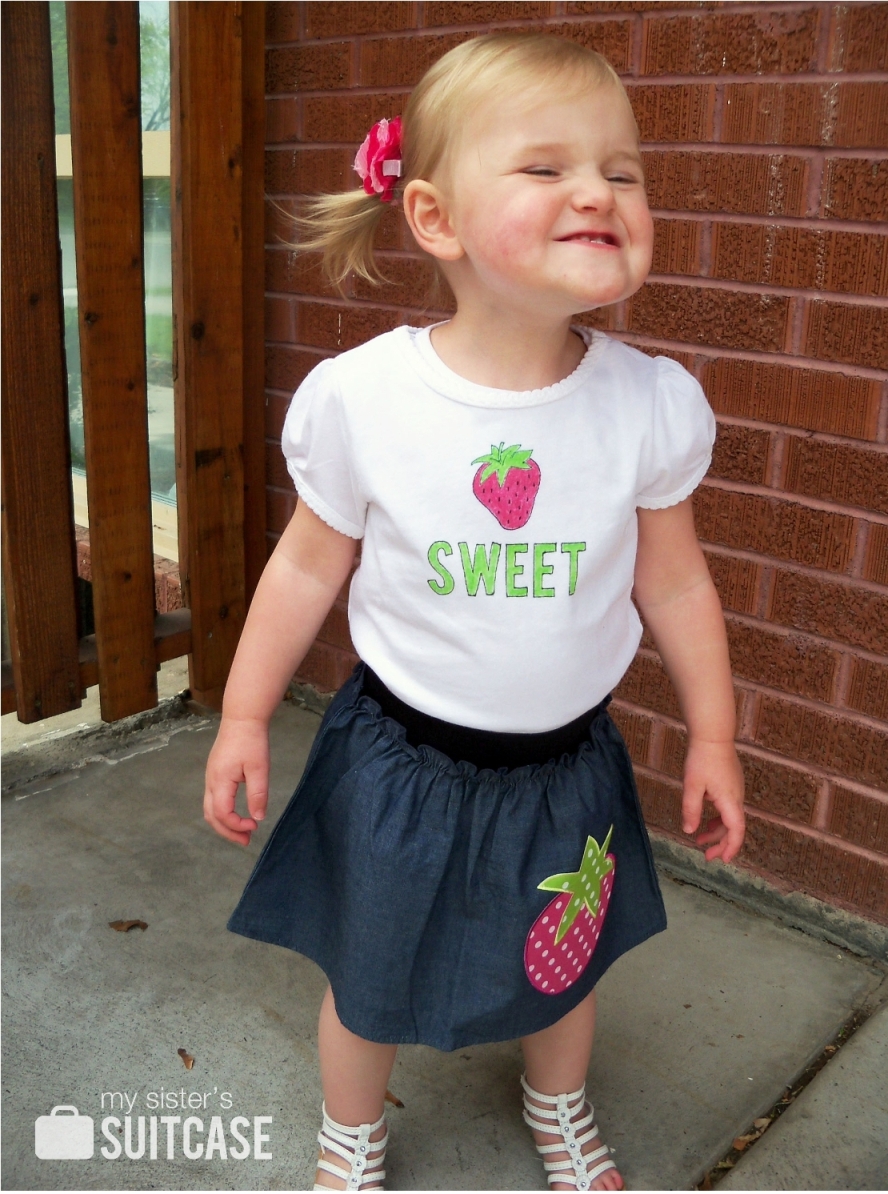
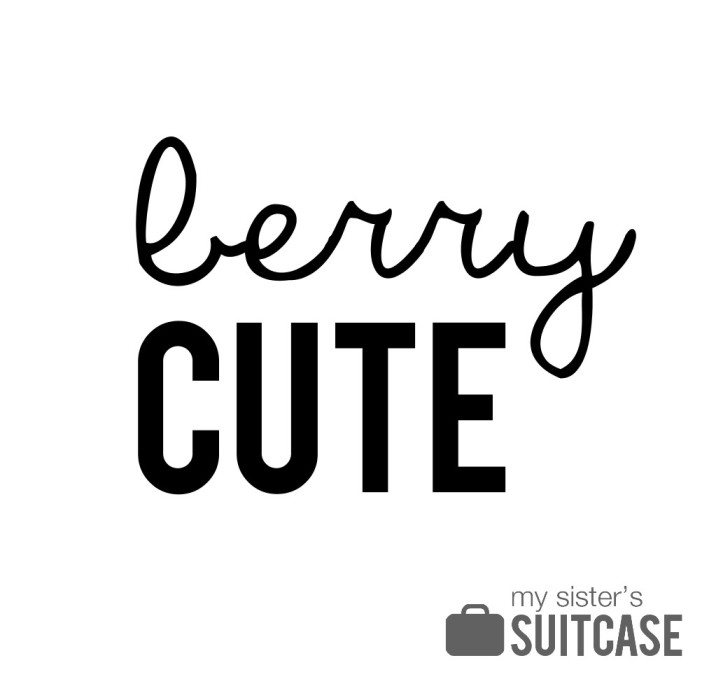
I decided to make matching outfits for our daughters… we’ll be seeing each other on vacation in exactly 4 days! For Anna, I made the “berry sweet” design, and for Nat’s daughter, Bella, I made “berry cute.” I started with a simple pattern:
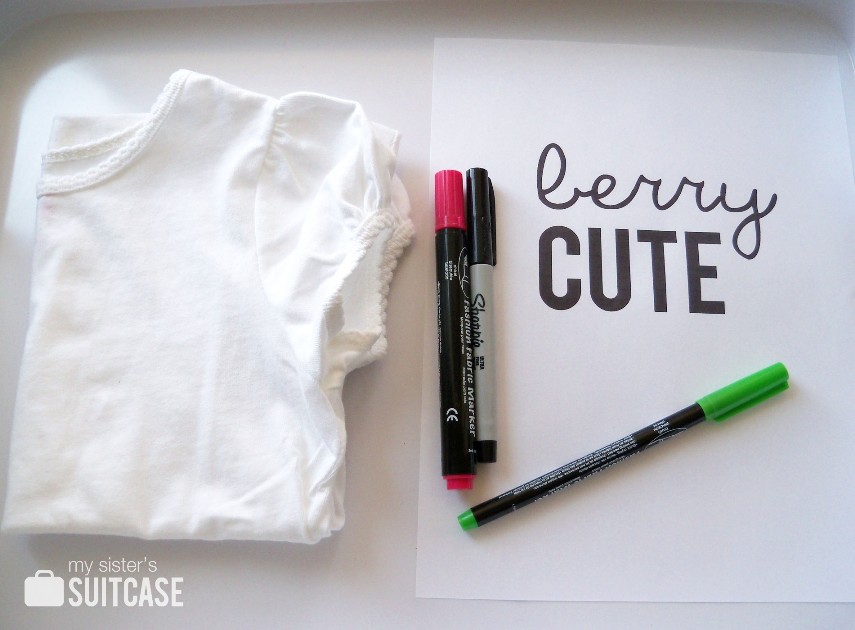
Here’s what you’ll need:
-
plain white shirt {mine is Garanimals from Walmart, $3}
-
fine black Sharpie… {they also have some cool new fabric markers}
-
fabric markers in desired colors {mine are Fashion Fabric Markers from JoAnn’s}
-
printed pattern
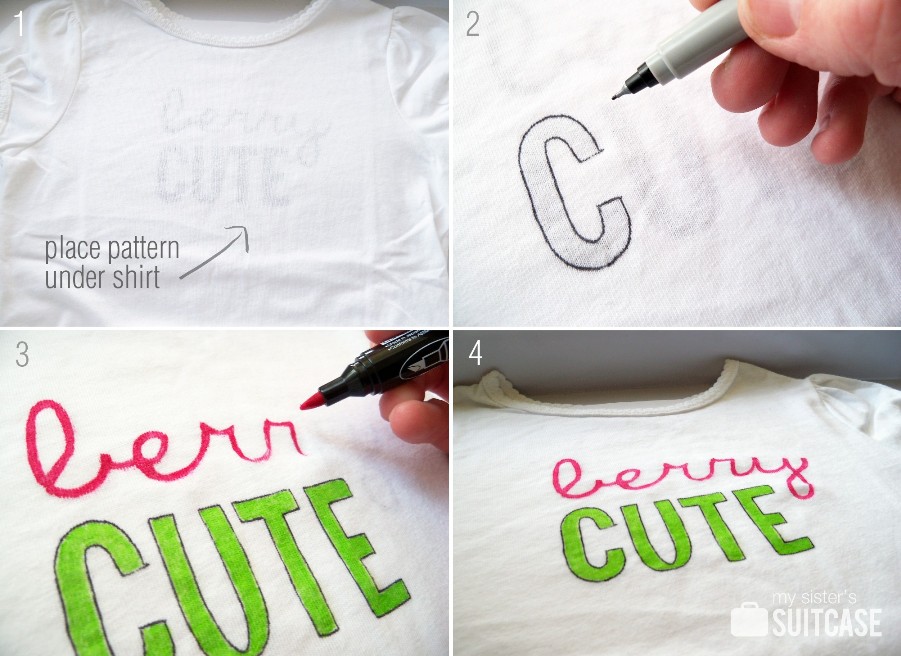
{1} Place the pattern underneath the top layer of your t-shirt {2} Make sure it is centered, then start tracing carefully with your black Sharpie. After all of the letters are outlined, fill in with a fabric marker. It is easy to use because the tip is shaped like a brush and distributes the color nicely. {3} Continue tracing your design. For the “berry” I used a chisel tip fabric marker. It worked well for precision and adding a little extra thickness to the letters. {4} Let your design dry completely before you wash. (Oh, and you should “heat set” the design by throwing it in the dryer before you wash it.)


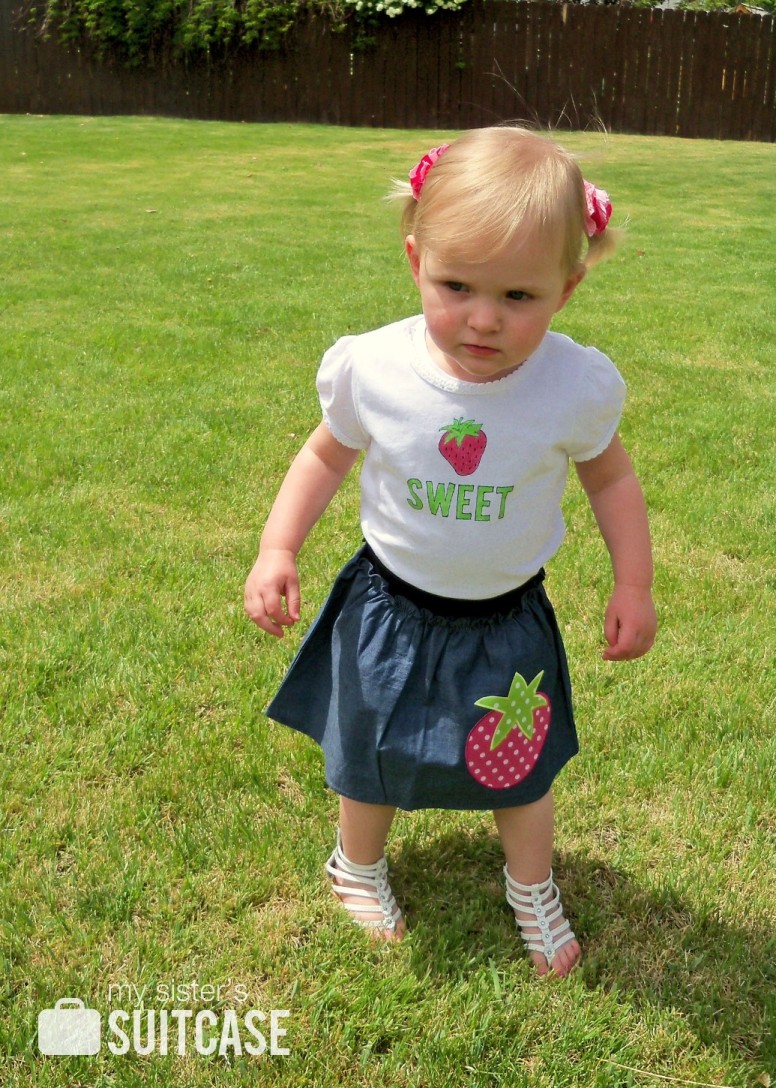
These were SO simple to make, and now my boys want to make some too {with Star Wars and Pokemon!} Think of all the ways you could customize these 🙂 I love that I was able to make a custom outfit for less than $10!

I got the little chambray skirt at Target for $5, and the adorable strawberry {iron-on} applique at JoAnn’s on clearance for 50 cents!! The shirt was only $3, plus the cost of my markers. Now these cute cousins will have fun wearing matching outfits next week 🙂

…………………………………………………………………………..
No, thank YOU, ladies!
I really love how simple (and cute) this idea is.
And…umm…seriously?
How nice are these sweet girls?
please, Please (PLEASE!) go leave suggestions and then vote on the final pattern for the twins’ onesies.
That would pretty much make my week!
it`s a cool idea of dressing a child! nice to meet u, girls) i like to sew, so I`ll try to do such a picture on a t-shirt myself)
Hey Abbie, I was just browsing around, and I found this, so I thought I’d share it with you…
“God touched our hearts so deep inside, our special blessing multiplied.” ~Author Unknown
What awesome girls – and what a fantastic idea!!! 🙂 I think I might just have to add them to my reading list! 😉 (I was over there the other day looking at their luggage tags… bril!!!)
Such a fun and easy project- but it looks awesome! So sweet! Thanks for your post- it was great to “meet” you girls!
xo Becca
Those sisters are the cutest EVER!! And, you’re so right about their awesome blog. Love it and love this outfit idea. I’m so trying out those fabric markers!!
Oh! I will so totally do this for small one. Thanks so much for the great tutorial C:
so cute!! You girls are seriously talented and I agree…not a bad post…ever!! I’m heading over to put in my two cents about those onesies for Abbie!
Love those girls, and I LOVE the marker tee idea! So super cute and simple! Awesome!!!