by Abbie

I mentioned several times last week that I was busy practicing for BODYCOMBAT launch (the fitness “party” each quarter when we introduce our members to new choreography and music), so naturally for Move-it Monday, I thought I’d give a glimpse of how this launch turned out.

Except this time, I thought I’d do it in video form. I mean, yes, I’ve done picture tutorials on both our basic punches and kicks and even issued a few challenges for you guys to tackle if you so chose. But nothing quite conveys the energy of the class like a video, so…here you go:

I would like to point out that I sound nothing like that in real life. I even thought about doing another video of me just talking to you so you could hear my normal voice (which is rather low, actually), but that would have required makeup application and hair fixing, and…yeah, it didn’t happen.

Suffice it to say that our gym’s sound system is a bit wonky, and the sound levels are very difficult to get right, which often results in our attempting to talk louder and louder or change the tone of our voices to compete with the music until, well, you end up sounding a bit shrill and wonder why you bothered with the mike in the first place.

Just for fun, I thought I’d another quick clip of how my baby daughter Della “moves-it.” Those really are her signature dance moves.

I love hearing from you guys!

Hey there, folks!

I’m so excited to be here giving Ashley a little relief while she works her magic on her law exams (Go, Ashley!), and I want to say a huge thanks to her for letting me stop by and share a little about my corner of blog-land.

My name is Abbie from Five days…5 ways and Secondhand or Bare Bottom. That’s right. I run not one but two blogs. Because being a wife, a mama to three children under 6, teaching fitness classes, trying to keep my house reasonably clean, and knocking out a few DIY projects now and then doesn’t keep me busy enough.

Uh huh.

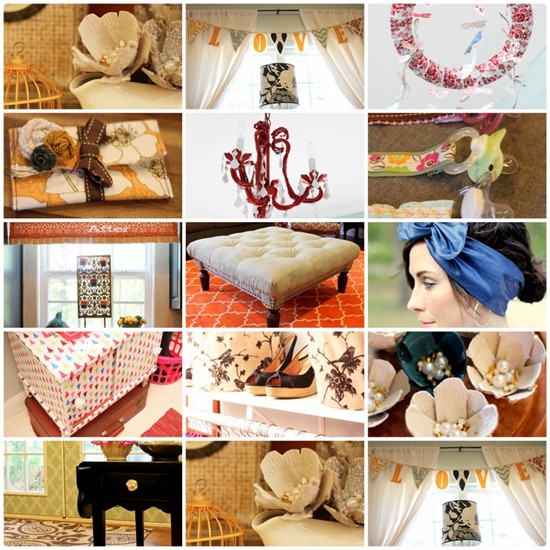
Here’s a quick peak at some of the things that I’ve been up to at Five days…5 ways, my primary blog where I write about a different theme for each day of the week (Move-it Monday—fitness, Try-it Tuesday—tutorials, Wardrobe Wednesday—fashion, 5 Things Thursday—a linky party where you can join me in posting a list with pics of 5 items on your mind, and Feature Friday— what/whomever I want to feature that day):

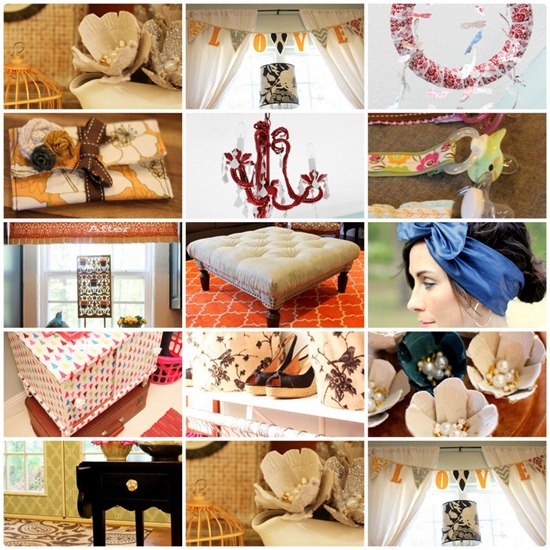
Collages

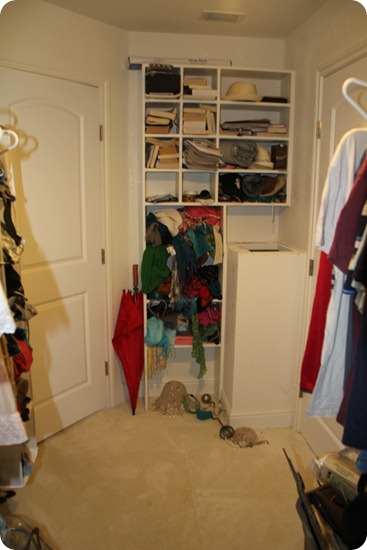
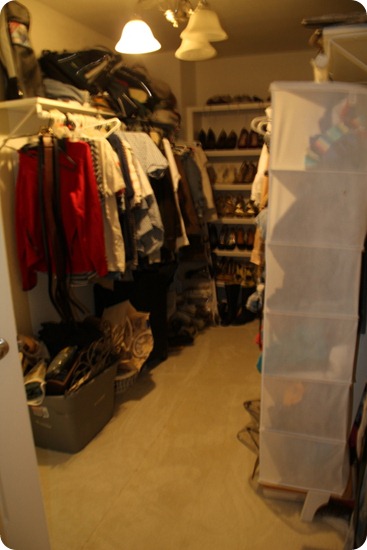
Today, I’m sharing a taste of my master closet, which I recently overhauled so that instead of looking like this:

IMG_2908-1

Lord a’mercy!

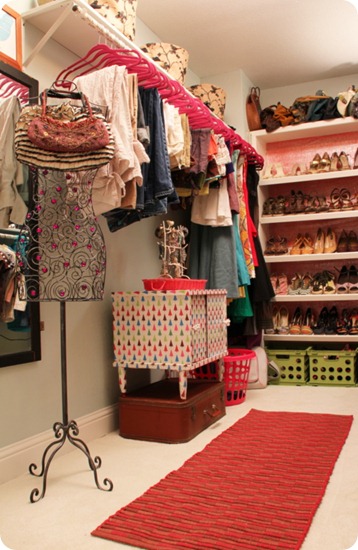
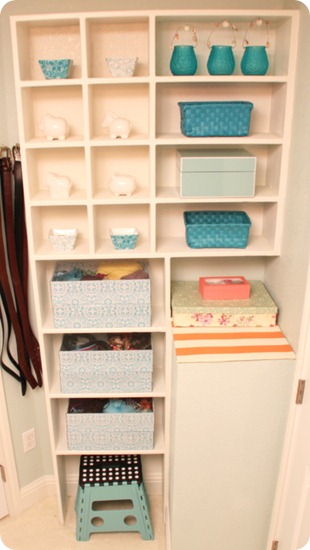
…it now looks like this:

IMG_4745

…and from this:

IMG_2912

…to this:

IMG_4779-1

We built 98% of our house ourselves, and my amazing husband custom-made the shoe-shelves, cubbies, and even the laundry chute…I ♥ him! Still, nothing was being utilized or organized to its fullest potential.

But it was nothing a little bucket-load of DIY elbow grease couldn’t remedy.

Okay, so paint, glue, and sweat is more like it, but either way, I am beyond happy with the results, and it makes going in there to find outfits to wear for my 100% thrifted style blog, Secondhand or Bare Bottom, a fun excursion rather than a chore.

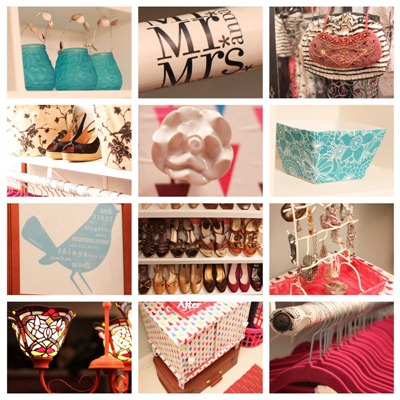
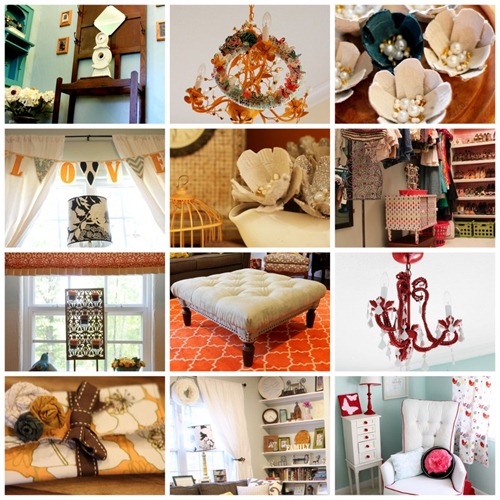
Here’s a round-up of some of my favorite details, including the closet rods I decoupaged with some “Mr. and Mrs.” gift-wrap I found at Walmart (let’s be honest—there never was a Mr. who got his fair share of a closet, but I did leave him one rod!), a garage sale chandelier I revitalized with some stained glass shades, a few Goodwill treasures, and several other thrifty finds I rounded up to achieve a knock-out effect without getting knocked out by the bill (the entire closet reno ran us less than $150):

2011-07-27

Oh, aqua and fuchsia, how I love thee!

Want to see the entire transformation? Here you go!

I hope you’ll take the time to stop by for a visit at either/both of my blogs! I love meeting new people! Especially this month when I’m hosting a huge giveaway/fundraiser. You’ll have the chance to win one of three great prize packages featuring names like Lisa Leonard, and at the same time, you’ll be helping to raise the money to build a classroom for a group of over 1,000 orphans in Uganda that my family helps to support. Follow along for details coming November 1st!

A big thanks again, Ashley, for letting me meet your awesome readers today! You rock, girl!

I love hearing from you guys!

Hi there, folks! I’m so excited to be sharing a fun repurposing craft with you today at Homemaker on a Dime, and I want to say a huge thanks to SJ for having me by for a visit!

My name is Abbie from Five days…5 ways and Secondhand or Bare Bottom. Yes, that’s right. I run not one but two blogs. Because being a mama to three children under 6, teaching fitness classes, trying to keep my house reasonably clean, knocking out a few DIY projects now and then, and spending time with my amazing husband doesn’t keep me busy enough.

Uh huh.

Here’s a quick peak at some of the things that I’ve been up to at Five days…5 ways, my primary blog where I write about a different theme for each day of the week (Move-it Monday—fitness, Try-it Tuesday—tutorials, Wardrobe Wednesday—fashion, 5 Things Thursday—a linky party where you can join me in posting a list with pics of 5 items on your mind, and Feature Friday— what/whomever I want to feature that day):

2011-08-21

Today, I’m going to show you a “green” way to take those cute reusable tote bags that are popping up in every supermarket and even retail stores and repurpose them in a fun, functional way for your baby.  Even if you don’t have a little one, these make for super-simple custom baby gifts.

So what is this repurposing stroke of genius?

Easy-wipe bibs!

Think about it—the tote bags are usually made of sturdy recyclable plastic, and they often come in fantastic patterns, prints, and colors that would cost $$$/yard from a fabric store.  Instead, you pay $0.99 for about a yard of “material,” which is just too good for a bargain-shopper like me to pass up!

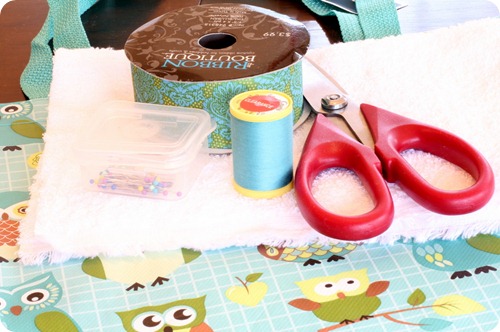
Here’s what you’ll need:

IMG_8388

    • Plastic tote bag
    • Terry-cloth
    • Thread/needle
    • Ribbon (mine is 1 1/2” because I loved how this pattern coordinated with that adorable owl print on my tote, but 7/8” would also work great)
    • Scissors (obviously)
    • Sewing machine (optional…you could definitely sew this project by hand)
    • Bib template (click for the one I made/used, or you could certainly create your own)

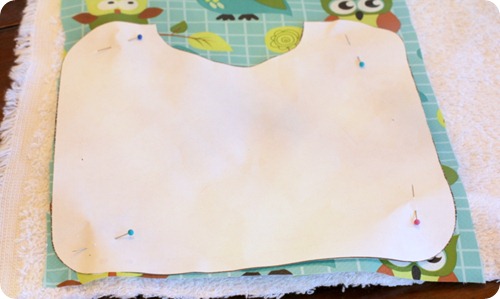
1. Cut out your template or bib-shape of your choice and layer it over both your tote material and your terry cloth. Pin the corners.

 IMG_8412

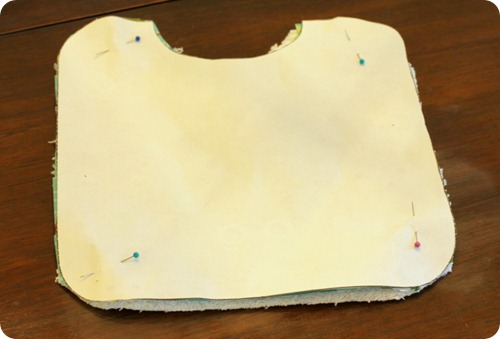
2. Cut around your template until you have the desired bib shape in both materials (P.S. I apologize for the funky coloring in the rest of my photos; life gets a bit harry with small children and a husband getting ready to leave for a week-long work-trip, and I’m afraid I lost my good light).

IMG_8415

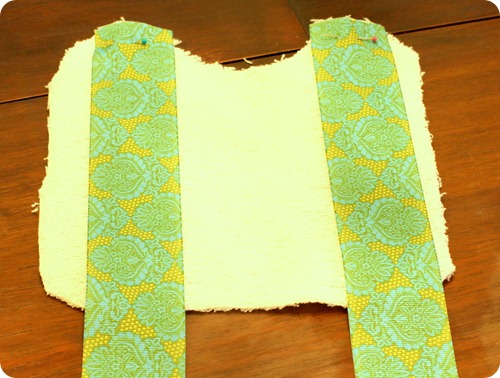
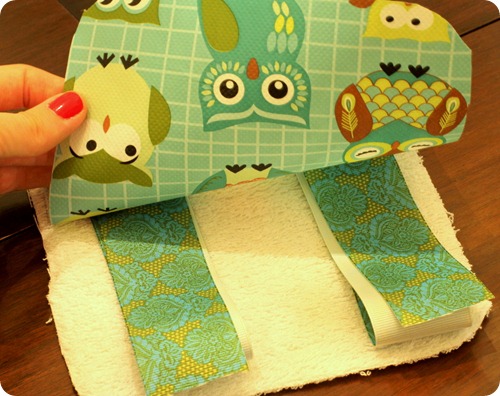
3. Pin your ribbon to the top of your terry-cloth (because my ribbon was so thick, I cut 18” streamers for each side, but this could be shortened considerably for thinner ribbon).

IMG_8440

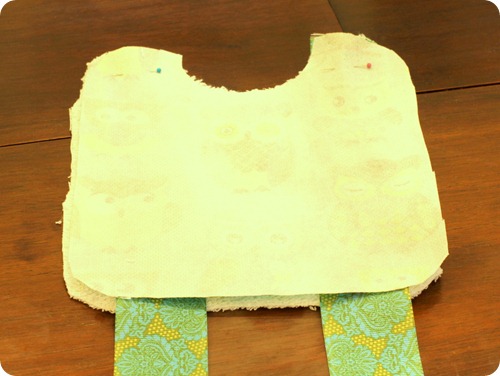
4. Lay your tote material over the ribbon, right sides together.

IMG_8441

5. Fold the ribbon up several times to avoid stitching through it. You can even pin it in place to keep it from flopping loose once you start sewing.

IMG_8444

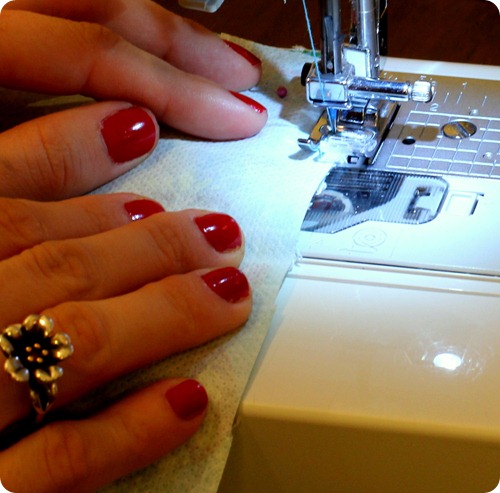
6. Stitch around the edge of your layered materials, leaving at least 1/4” seam allowance (I wouldn’t got any higher than 1/2”, though, since this is not a large bib to begin with).

IMG_8445

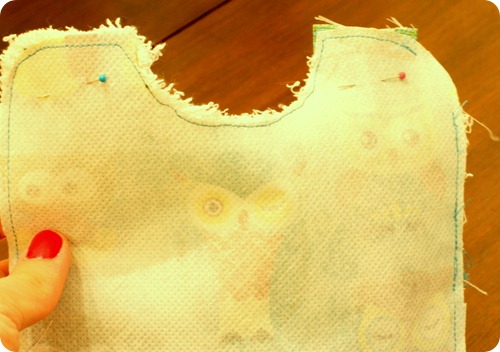
7. Continue stitching your edges together, leaving about a two inch gap so that you can turn your bib right-side-out (hopefully your stitching is less wobbly than mine can be sometimes…this is what happens when you sew while your five-year-old feeds the baby and you’re constantly looking over your shoulder to make sure there’s more yogurt getting in her mouth than on her face)

IMG_8451

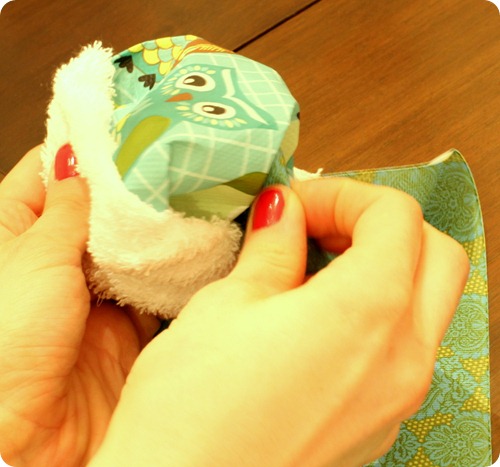
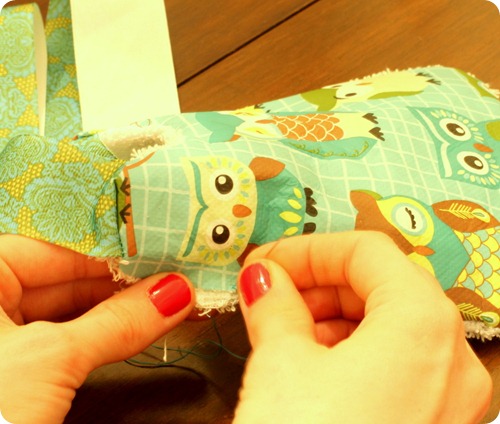
8. Bit by bit, pull your innards so that they become your outwards (helpful hint: don’t shove your finger inside without looking unless you really like the feeling of a pin being jabbed into it…I don’t).

IMG_8453

9. Close the gap with your needle and thread, and…

IMG_8455

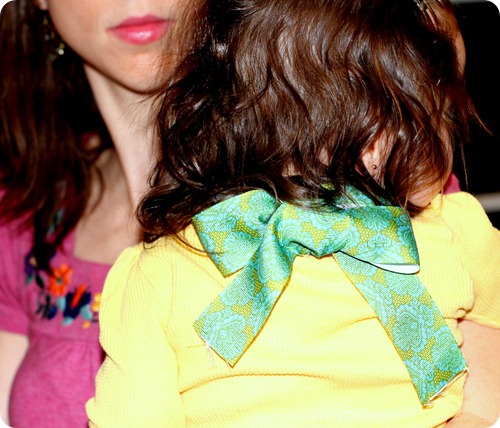
10. Find an adorable baby-model to try your cute custom bib on.

IMG_8470

Ooooh. Look at that pretty bow!

IMG_8475

And there you have it, folks. A great way to think outside the fabric box so that you can have boutique-style goodies for your tykes without the high-end price-tag!

(P.S. I find the best tote-bag prints at Marshall’s. I looooove practically every single one they carry!)

Thanks again, SJ, for introducing me to your awesome readers, and thank you, awesome readers, for coming along with me on our little crafting jaunt today.

I hope you come join me on my blogging journey. Coming soon in November: a huge giveaway which could not only win you 1 of 3 really great prize packages but could also buy the materials to build a classroom for a group of orphans my family helps to support in Uganda. Stay tuned for how…

Hope to see you soon!


I love hearing from you guys!

Hi there, folks! I’m so excited to be sharing a fun fall craft with you today at Simple as That, and I want to say a huge thanks to Rebecca for having me by for a visit!

My name is Abbie from Five days…5 ways and Secondhand or Bare Bottom. Yes, that’s right. I run not one but two blogs. Because being a mama to three children under 6, teaching fitness classes, trying to keep my house reasonably clean, knocking out a few DIY projects now and then, and spending time with my amazing husband doesn’t keep me busy enough.

Uh huh.

Here’s a quick peak at some of the things that I’ve been up to at Five days…5 ways, my primary blog where I write about a different theme for each day of the week (Move-it Monday—fitness, Try-it Tuesday—tutorials, Wardrobe Wednesday—fashion, 5 Things Thursday—a list with pics of 5 items on my mind, and Feature Friday— what/whomever I want to feature that day):

2011-08-21

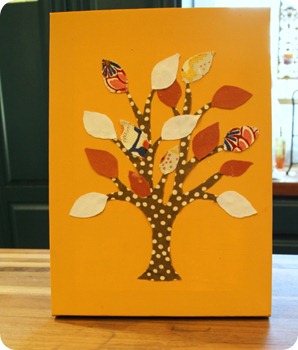
Today, I’m going to show you how to make a sweet little family tree craft that really is simple as that!

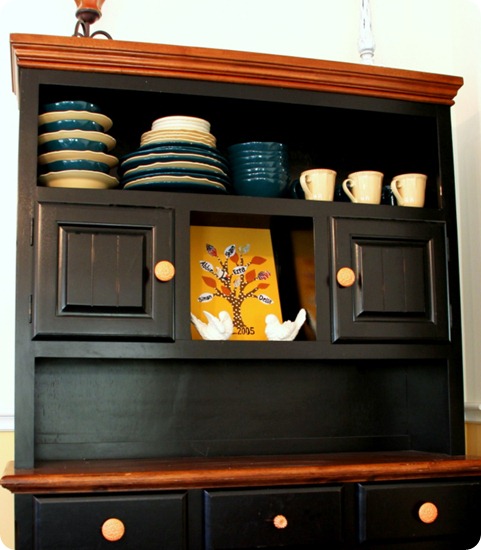
IMG_7700-1

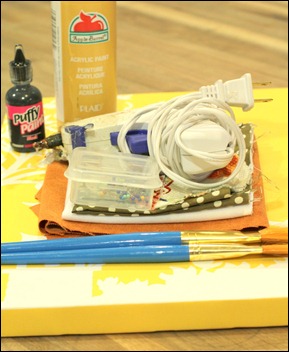
Here’s what you’ll need to get started:

IMG_7620IMG_7622

    • Canvas (I found mine—which is 10”X14”—at Target on clearance for $3, and it was already cute, but I didn’t really have anything in my décor to match its Asian flair, so I decided to repaint it). You could easily use poster board or wrap cardboard in fabric. Feel free to be creative with your background
    • Brushes
    • Craft paint (both of these are assuming that you’re starting with a canvas that you want to paint)
    • Straight pins
    • Fabric scraps (I chose two patterns and two solids)
    • Glue (I used a combo of hot glue and Elmer’s, though only the hot glue made it in my “ingredients” pic)
    • Puffy paint (this is for writing your family names on your leaves and could just as easily be a felt tip marker or fabric marker)
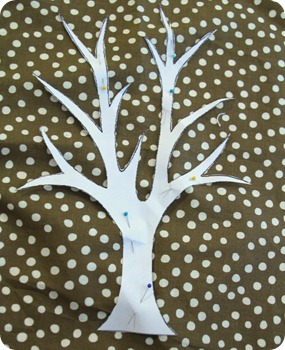
    • Trunk/leaves template. You can, of course, make your own, or you can click here for my PDF template if you like what I’ve done.

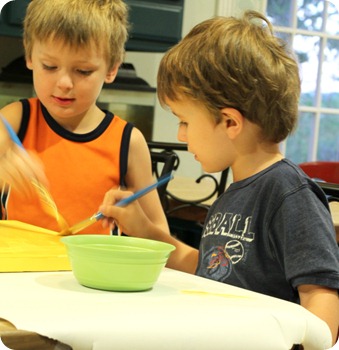
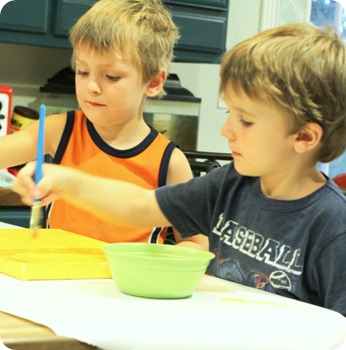
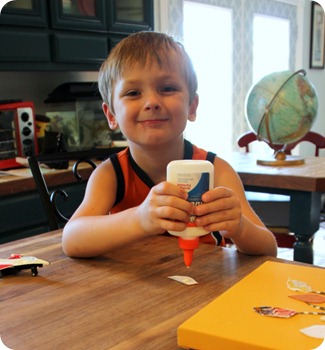
1. If you’ve got them, recruit a couple of willing helpers like these cute little gents:

IMG_7623IMG_7629

Although this project is fairly kid-friendly, it might be best with ages 7 and up. Mine are 5 and 3 1/2 (the boys) and 10 months (the girl). So, the boys’ main occupation was slathering the canvas with paint, and the girl was pretty busy sticking everything in sight in her mouth, while I…

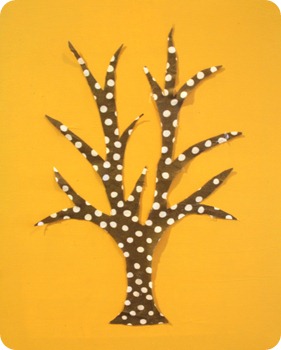
2. Cut out the trunk (and fished leggos out of baby mouths):

IMG_7644

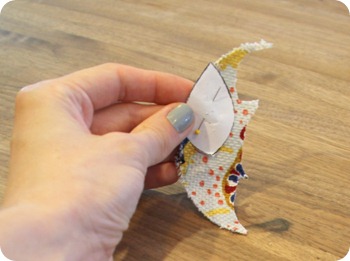
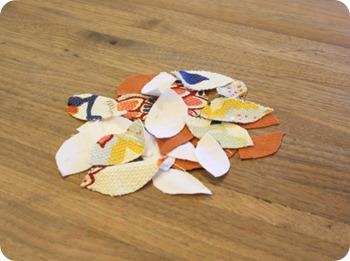
…and leaves

IMG_7651IMG_7653

3. Glue your trunk to your canvas (I hot-glued mine to make it extra-secure).

IMG_7654-1

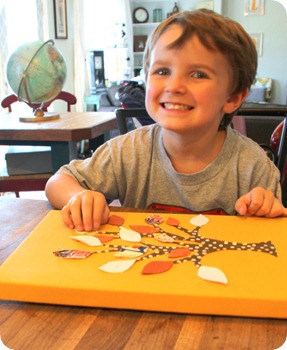
4. Assign your helpers the incredibly important job of leaf-gluing. I would not suggest assigning them the incredibly important job of leaf arrangement if you plan to display your family tree art anyway that adults might see it!

We used Elmer’s for this step to avoid the inevitable burnt fingers that would have resulted from any proximity of three-year-old hands to hot glue (who am I kidding? Mama’s just as bad as the 3-year-old!)

IMG_7665

IMG_7659-1IMG_7669

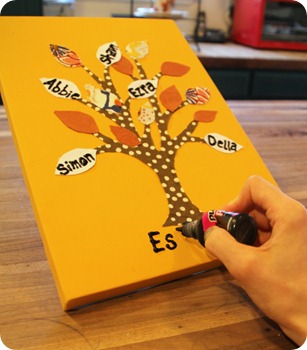
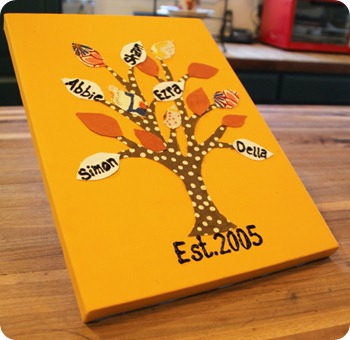
5. Using your puff paint or markers, print your family names on the designated leaves. Obviously, the light leaf/dark print combo works best for visibility. Also, if you go the paint route, be sure to proceed slooooooowly. The paint tends to explode from the tip and glop up your painting before you even realize you’ve given it a good squeeze. Fortunately, I had the good sense to test it out first (I can think of many a project where this was not the case), and I got a good feel for the ornery little critter. I’m not saying it’s perfect by any stretch of the imagination, but there were no paint explosions, and I call that success!

IMG_7688IMG_7689

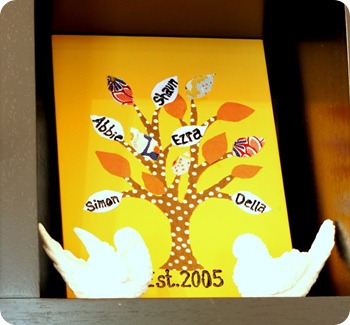
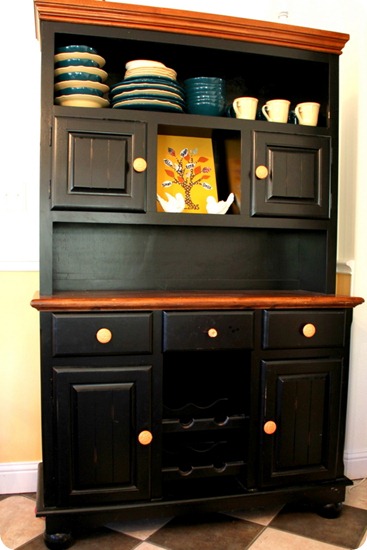
6. Find yourself somewhere to proudly display your magnificent artwork. I had the perfect spot in mind:

IMG_7691

I even had a couple of pretty white birds just waiting to perch in its branches. Okay, so maybe they were a little big and probably would have smashed my little tree to smithereens if they’d actually tried, but they sure looked good roosting just beside it.

IMG_7693

And there you have it! A fetching little fall craft for you and your tykes.

I hope you get a chance to try it out, and I would love it if you have a moment to stop by Five days…5 ways, say hey, and check out the other hijinks we get up to each day.

I love hearing from you guys!

Hello there, folks!

I’m so excited to be here giving Ashley a little relief while she works her magic on her law exams (Yay, Ashley!), and I want to say a huge thanks to her for letting me stop by and share a little about my corner of blog-land.

My name is Abbie from Five days…5 ways and Secondhand or Bare Bottom. That’s right. I run not one but two blogs. Because being a wife, a mama to three children under 6, teaching fitness classes, trying to keep my house reasonably clean, and knocking out a few DIY projects now and then doesn’t keep me busy enough.

Uh huh.

Here’s a quick peak at some of the things that I’ve been up to at Five days…5 ways, my primary blog where I write about a different theme for each day of the week (Move-it Monday—fitness, Try-it Tuesday—tutorials, Wardrobe Wednesday—fashion, 5 Things Thursday—a linky party where you can join me in posting a list with pics of 5 items on your mind, and Feature Friday— what/whomever I want to feature that day):

2011-08-21

Today, I’m sharing a taste of my master closet, which I recently overhauled so that instead of looking like this:

IMG_2908-1

Lord a’mercy!

…it now looks like this:

IMG_4745

…and from this:

IMG_2912

…to this:

IMG_4779-1

We built 98% of our house ourselves, and my amazing husband custom-made the shoe-shelves, cubbies, and even the laundry chute…I ♥ him! Still, nothing was being utilized or organized to its fullest potential.

But it was nothing a little bucket-load of DIY elbow grease couldn’t remedy.

Okay, so paint, glue, and sweat is more like it, but either way, I am beyond happy with the results, and it makes going in there to find outfits to wear for my 100% thrifted style blog, Secondhand or Bare Bottom, a fun excursion rather than a chore.

Here’s a round-up of some of my favorite details, including the closet rods I decoupaged with some “Mr. and Mrs.” gift-wrap I found at Walmart (let’s be honest—there never was a Mr. who got his fair share of a closet, but I did leave him one rod!), a garage sale chandelier I revitalized with some stained glass shades, a few Goodwill treasures, and several other thrifty finds I rounded up to achieve a knock-out effect without getting knocked out by the bill (the entire closet reno ran us less than $150):

2011-07-27

Oh, aqua and fuchsia, how I love thee!

Want to see the entire transformation? Here you go!

Also, here’s a quick peak at some of the things that I’ve been up to at Five days…5 ways, where I blog about a different theme for each day of the week (Move-it Monday—fitness, Try-it Tuesday—tutorials, Wardrobe Wednesday—fashion, Five Things Thursday—a picture diary of 5 things on my mind, and Feature Friday— what/whomever I want to feature that day):

2011-08-21

I hope you’ll take the time to stop by for a visit at either/both of my blogs! I love meeting new people! Especially this month when I am hosting my biggest giveaway yet! You’ll have the chance to win one of three great prize packages featuring names like Lisa Leonards, and at the same time, you’ll be helping me to raise the money to build a classroom for a group of over 1,000 orphans in Uganda that my family helps to support. Follow along for details coming November 1st!

A big thanks again, Ashley, for letting me meet your awesome readers today! You rock, girl!

I love hearing from you guys!

With all of the incredible DIY projects populating the blogosphere, it’s easy to imagine practically anything becoming a project.

But an entire DIY house?

It probably sounds a bit like overkill, but it’s exactly what our family set out to do a little over three years ago (and is still doing today in many ways).

If you didn’t believe that we did practically every bit of it ourselves, I wouldn’t blame you. I live in my house (thank goodness!), and sometimes I walk in, look around, and can hardly believe that we (and by we, I mostly mean my amazing husband with help from his dad) built…
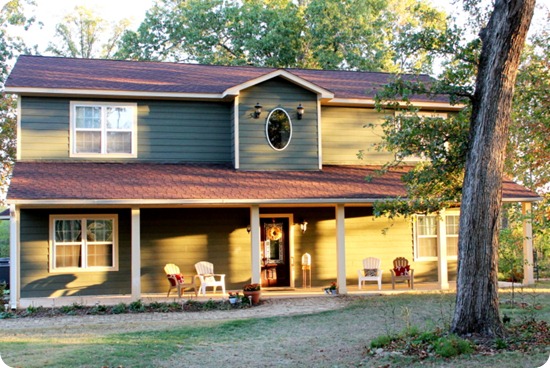
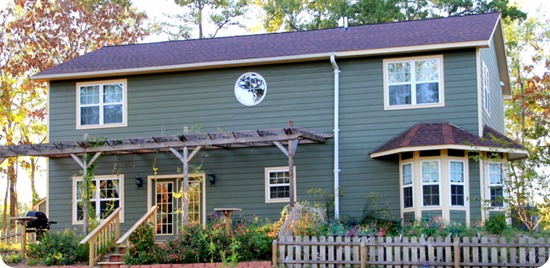
IMG_7578IMG_7540

…this house (and the fence and the pergola, and the walkway, and…well, you get the idea).

A few months before we got married 6+ years ago, we bought an 1,800 sq. ft. house in a rural subdivision. It was cute and situated on over an acre of land—the perfect starter-home…for us, anyway. We spent the next three years doing the usual newlywed sprucing—decorating, gazebo-building, greenhouse-constructing. Okay, maybe those last two aren’t the usual, but apparently, we were just getting warmed up.

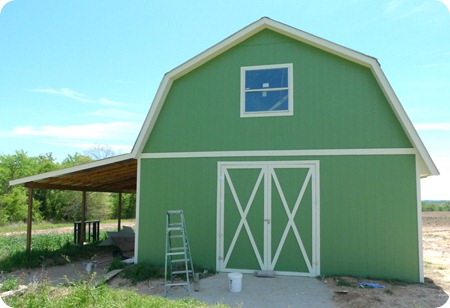
By the end of that three years, we had two little boys, and we knew we wanted more kids someday. We also loved the idea of space and lots of it. So, when we found a beautiful 28-acre piece of land about 5 miles down the road, we bought it, intending to sell our house and build on the new piece of land…some day. In the meantime, my husband and father-in-law built a barn so we wouldn’t have to rent storage when we did move. (The wall-raising day happened to coincide with a raging storm, complete with gale-force winds. As I’m sure you can imagine, getting the walls up was a bit of a challenge; I seem to remember something about the wind blowing one down).
P1000381

I ♥ our green barn! (This picture was taken right after we built it over two years ago; obviously we managed to get the walls back up).

When we put our house on the market, it sold in one month!

So, we packed up and moved into the second story of my parents’ home, complete with a full kitchen, a washer/dryer combo, and two bathrooms (yeah, we were roughin’ it).

We decided to draw up our own blueprints and quickly discovered that what we wanted was a custom house without having to pay custom prices. To achieve that, we spent most of our waking hours over the next year planning, scouring the clearance aisles at Lowe’s for deals and haunting local bargain surplus stores, sourcing contractors for the few tasks that simply weren’t worth taking on ourselves, and then…what else?

Oh yeah. Building the house.

Here’s what we started with:

Misc - 1110 012

Not daunting at all, right?

And after a lot of clearing:

Misc - 0108 006

Better…but still an insane amount of work to do.

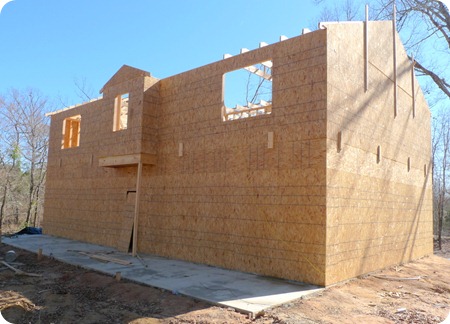
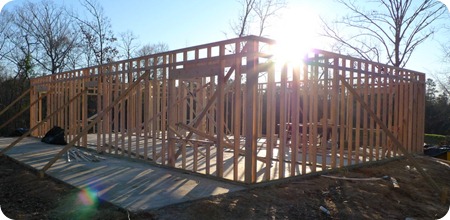
Not too much later (my husband says that framing is the fastest and most fun part of building), we had this:
P1000149

And then this:

P1000257

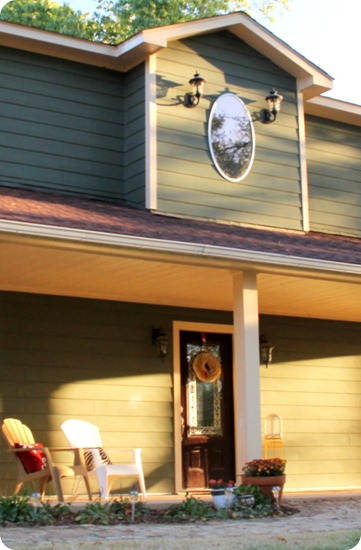
And finally this:

IMG_7557

So, how did we manage it? Especially with two children under two and the need for my husband to continue working to provide income to live on and, well, pay for the house?

Have you heard the, “How do you eat an elephant,” dilemma?

If so, then you know the answer is, “One bite at at time.”

And that’s about right.

Bit by bit, day by day, we kept at it until, lo and behold, a house emerged. If that sounds too easy, let me assure you that easy was the last thing it was. But it was doable.

We kept constant task-lists running:

Shaun—frame up house

Abbie—find lighting that’s cheap but not cheaply made

Shaun—put roof on

Abbie—hold down the fort at home

Shaun—run electrical and plumbing

Abbie—paint everything in sight

(Aren’t we talented list-makers?)

So, what all did we do ourselves? Well, it would probably be easier to list what we didn’t do. So, here goes.

We did not:

    • Do all (most but not all) of the clearing/dirt-work
    • Pour the slab (although Shaun did set the forms)
    • Install the A/C
    • Build/install the kitchen cabinets
    • Paint the exterior
    • Blow in the insulation
    • Do all of the dry-wall/texture

Everything else—from tiling to wood-floors, from spackling to painting, from electrical to plumbing, from framing to trim, from stair-building to crown-molding, window-installation, tub-installation, can-light-installation—you name it, we did it.

And several of the things we didn’t do ourselves, we bartered services for. My husband is a talented computer programmer and web designer, and we got a deep discount on both our A/C units and our kitchen cabinets because we found top-notch craftsmen who needed websites built for them and were willing to exchange a portion of their fees for a custom site.

Here’s a shot of my uniform for the better part of six months:

P1000635

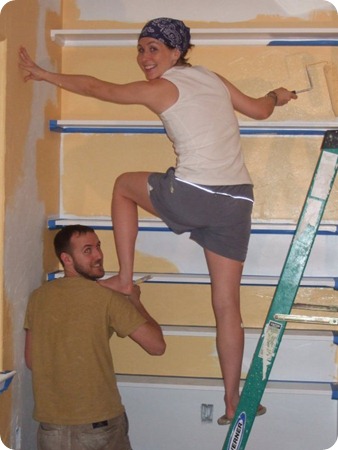
No make-up—check. Dew-rag to hide greasy hair—check. Paint-stained top—check. (I think I’m making microwaveable brownies here since the microwave was our only appliance with electricity at this point. Mm mmm, good).
painting with alby

One of many late night “painting parties.” What a supportive husband I have. : )

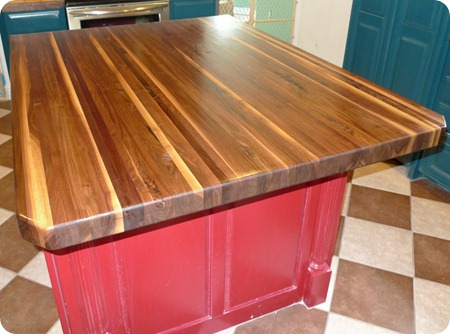
The day our walnut butcher-block (part of the cabinet barter) arrived, I think I did cartwheels around the kitchen!
P1000672

And here’s what the kitchen looks like in its (almost) finished form:
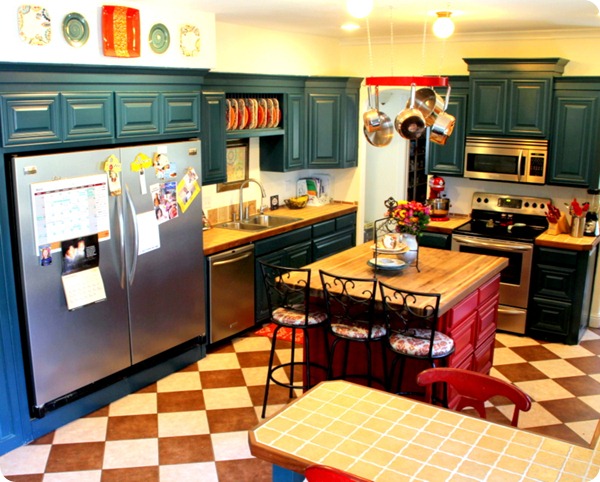
I did a post on the entire kitchen reveal if you’re interested in seeing more details (including how we managed to score our entire kitchen appliance suite for $1,300).

And here is a collage of shots from some of my favorite (mostly finished…really, when is a room ever completely done?) rooms in the house.
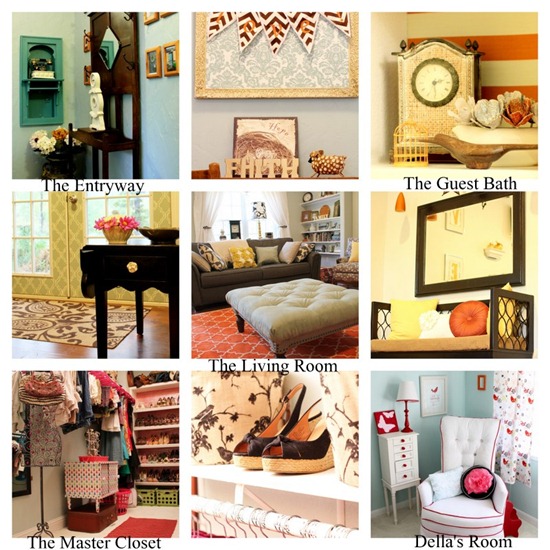
2011-08-211

I’ve done posts on all of these rooms as well if you want the deets.

So, what did I learn from our year-in-building experience?

1) Sleep isn’t nearly as essential as you think it is if there is an end in sight. What is essential is being slightly crazy (the sleep-deprivation helps with that).

2) Having an incredibly gifted husband who can work magic with a hammer or a keyboard in his hands is…I won’t say a necessity…but an invaluable bonus.

3) Building a big two-story “box” house (with small little variations like the bay-style windows in the breakfast nook) saves money both in construction costs and heating and cooling.

4) Lowe’s managers who are motivated to move their inventory are absolute godsends (I did an entire post on what I call “retail haggling,” in which I describe my methods for getting name-brand items like light fixtures and faucets and toilets—oh my!—for next-to-nothing).

5) Giving up one year of your life to own your dream-house free-and-clear at the ripe old age of 26 (29 for him) is sooooooo worth it!

Here we all are enjoying our front porch last Easter (that cute little girl is the latest addition to our family). I had to prove that I actually do wear something other than my painter’s clothes every now and then!

Now, if you’re like me, you’re probably dying to know numbers. So, here they are:

Our house is approximately 2,800 square feet and features many nice touches such as hardwood floors, crown molding, custom cabinets, name-brand appliances and bathroom fixtures, built-in shelving, a walk-in pantry and master closet, and much more…and the entire thing (minus home décor and outdoor improvements) ran us about $100,000.

Of course, that doesn’t factor in the effort and hassle of doing everything yourself, but the satisfaction of a job well done and beaucoups of money saved more than makes up for it.
I love hearing from you guys!