I’ve had this post written up for a while now, but when I saw the “Imagine Your Impossibilities” challenge link-up, I knew I wanted to go ahead and post it.

After all, if you had asked me what one thing I would have thought “impossible” in the grand of scheme of DIY possibilities, building 95% of our own house from scratch in less than a year and paying cash for it so that we owned it free and clear at the ripe old ages of 26 (me) and 29 (my husband)…

Yeah, I might have thought that was the ultimate impossibility.

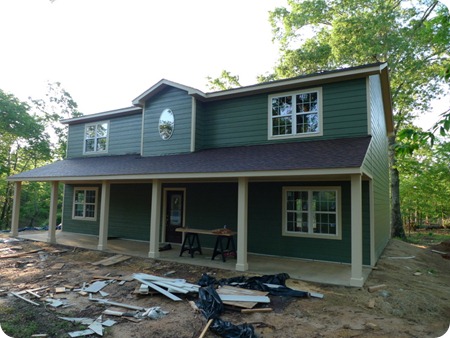
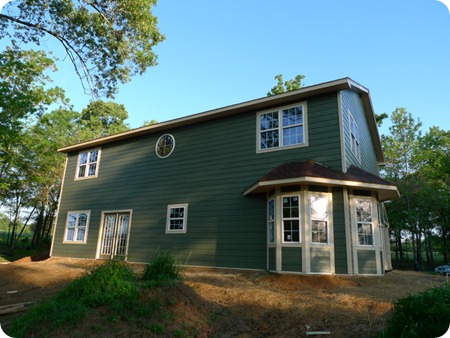
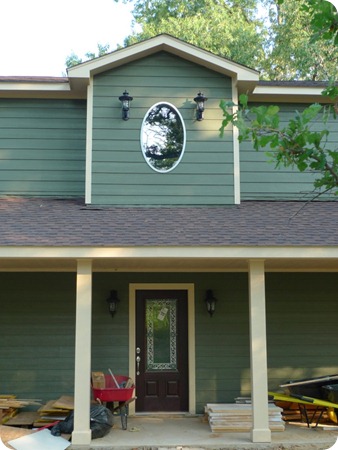
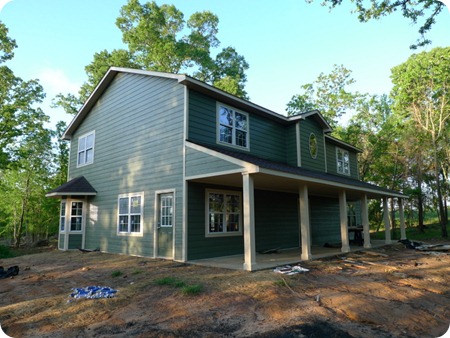
And yet, here I am at the ripe old age of 29, and I’ve now lived in my very own from scratch, 95% DIYed, cash-bought dream home for 2 1/2 years.

P1000416

P1000419P1000417

…this house.

So…how did we do it?

Well, a few months before we got married almost 7 years ago, we bought an 1,800 sq. ft. house in a rural subdivision.

It was cute and came with over an acre of land—the perfect starter-home…for us, anyway. We spent the next three years doing the usual newlywed sprucing. You know—decorating, gazebo-building, greenhouse-constructing.

Okay, maybe those last two aren’t the usual, but it was good practice for later on for us.

But by the end of that three years, we had two little boys, and we knew we wanted more kids someday. We also loved the idea of space and lots of it. So, when we found a beautiful 28-acre piece of land about 5 miles down the road, we bought it, intending to sell our house and build on the new piece of land one day.

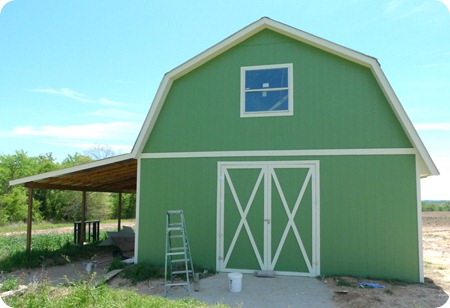
We put our house on the market, and my husband and father-in-law built a barn so we wouldn’t have to rent storage whenever we did move. (The wall-raising day happened to coincide with a raging storm, complete with gale-force winds. As I’m sure you can imagine, it wasn’t ideal; I seem to remember something about the wind blowing a wall down. Like down. On the ground).

P1000381

I ♥ our green barn! (This picture was taken right after we built it over two years ago; clearly, we were able to get the walls back up).

One month later, our “starter house” had sold!

So, we packed up and moved into the second story of my parents’ home, complete with a full kitchen, a washer/dryer combo, and two bathrooms (yeah, we were roughin’ it).

We drew up our own blueprints and quickly discovered that what we wanted was a custom house without having to pay custom prices. So for the next year, we spent most (pretty near all) of our waking hours planning, scouring the clearance aisles at Lowe’s for deals, haunting local bargain surplus stores, sourcing contractors for the few tasks that simply weren’t worth taking on ourselves, and then…what else?

Oh yeah.

Building the house.

Here’s what we started with:

Misc - 1110 012

Not daunting at all, right?

And after a lot of clearing:

Misc - 0108 006

Better…but still an insane amount of work to do.

Not too much later (my husband says that framing is the fastest and most fun part of building), we had this:

P1000149

And then this:

P1000257

And finally this:

P1000538

So, how did we manage it? Especially with two children under two and the need for my husband to continue working to provide income to live on and, well, pay for the house?

Have you heard the, “How do you eat an elephant,” dilemma?

If so, then you know the answer is, “One bite at at time.”

And that’s about right.

Bit by bit, day by day, we kept at it until, lo and behold, a house emerged. If that sounds too easy, let me assure you, it wasn’t.

We kept constant task-lists running:

Shaun—frame up house

Abbie—find lighting that’s cheap but not cheaply made

Shaun—put roof on

Abbie–take care of kids, including a 2 year-old who voluntarily constipated himself to avoid using the potty for an. entire. year (best.year.ever)

Shaun—run electrical and plumbing

Abbie—paint everything in sight

Shaun–build custom shelves

Abbie–spackle and caulk

Shaun–come home at 10 PM and answer emails/catch up on projects

Abbie–try to keep sanity

(Aren’t we talented list-makers?)

So, what all did we do ourselves?

Well, it would probably be easier to list what we didn’t do.

So, here goes.

We did not:

    • Do all (most but not all) of the clearing/dirt-work
    • Pour the slab (although Shaun did set the forms)
    • Install the A/C
    • Build/install the kitchen cabinets
    • Paint the exterior
    • Blow in the insulation
    • Do all of the dry-wall/texture

Everything else—from tiling to wood-floors, from spackling to painting, from electrical to plumbing, from framing to trim, from stair-building to crown-molding, window-installation, tub-installation, can-light-installation, you-name-it-we-did-it-installation…it was all us (mostly my crazy-talented and efficient husband with plenty of help from my equally talented and dedicated father-in-law).

And, if you’ve been around here at 5D5W for long, then you know that, several of the things we didn’t do ourselves, we bartered services for.

My husband is a talented computer programmer and web designer, and we got a deep discount on both our A/C units and our kitchen cabinets because we found top-notch craftsmen who needed websites built for them and were willing to exchange a hefty portion of their fees for a custom site.

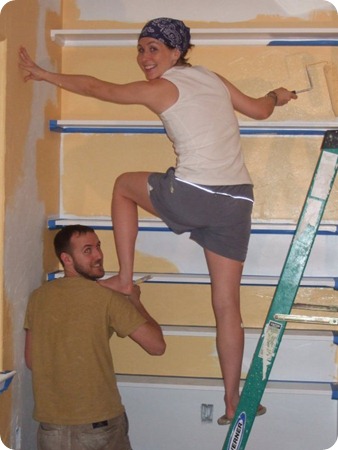
Here’s a shot of my uniform for the better part of six months:

P1000635

No make-up—check. Dew-rag covering greasy, unshowered hair—check. Paint-stained top—check. (I think I’m making microwaveable brownies here since the microwave was our only appliance with electricity at this point. Mm mmm, good).

painting with alby

One of many late night painting parties. What a supportive husband I have. (*groan*)

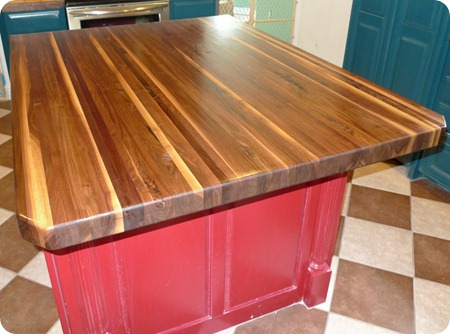
The day our walnut butcher-block (part of the cabinet barter) arrived was thrilling in the extreme!

P1000672

A quick reminder of what the kitchen looks like in its (almost) finished form:
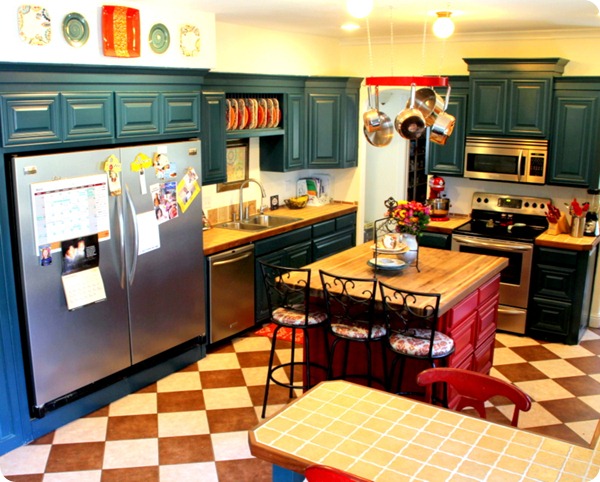
I did a post on the entire kitchen reveal if you’re interested in seeing more details (including how we managed to score our entire kitchen appliance suite for $1,300).

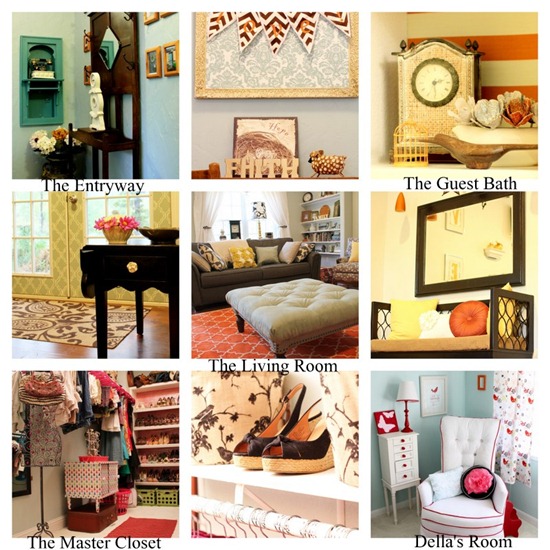
And here’s a collage of shots from some of my favorite (mostly finished…really, when is a room ever completely done?) rooms in the house.

2011-08-211

I’ve done posts on all of these rooms as well if you want the deets.

So, what did I learn from our year-in-building experience?

1) Sleep isn’t nearly as essential as you think it is if there is an end in sight. What is essential is being slightly crazy (the sleep-deprivation helps with that).

2) Having an incredibly gifted husband who can work magic with a hammer or a keyboard in his hands is…I won’t say a necessity…but an invaluable plus.

3) Building a big two-story “box” house (with small little variations like the bay-style windows in the breakfast nook) saves money both in construction costs and heating and cooling.

4) Lowe’s managers who are motivated to move their inventory are absolute godsends (I did an entire post on what I call “retail haggling,” in which I describe my methods for getting name-brand items like light fixtures and faucets and toilets—oh my!—for next-to-nothing).

5) Giving up one year of your life to own your dream-house free-and-clear while still in your 20’s is sooooooo worth it!

Here we all are enjoying our front porch last Easter.

Now, if you’re like me, you’re probably dying to know numbers. So, here they are:

Our house is approximately 2,800 square feet and features many nice touches such as hardwood floors, crown molding, custom cabinets, custom shelving, upstairs/downstairs laundry chutes, name-brand appliances and bathroom fixtures, built-in shelving, a walk-in pantry and master closet, and much more.

And the entire thing (minus home décor) ran us about $100,000.

Of course, that doesn’t factor in the effort and hassle of doing everything yourself, but the satisfaction of a job well done and beaucoups of money saved more than makes up for it for us.

Plus, we had an appraisal done after completion, and the value of the house came in at just under $250,000.

Yep, you read that right. If we ever sell it, we can expect to make a cool $150K in cash profit.

And you can’t beat that with a stick…or anything else you might have in your DIY toolbox for that matter.

So, what do you think?

Are we certifiable?

Or would you do it if you had the chance?
I love hearing from you guys!

Hi there, folks! I’m so excited that Nina is having me by for a visit to chat with you stylin’ chickies about thrifty fashion.

My name is Abbie from Five days…5 ways and Secondhand or Bare Bottom. Yes, that’s right. I run not one but two blogs. Because being a mama to three children under 6, teaching fitness classes, trying to keep my house reasonably clean, knocking out a few DIY projects now and then, and spending time with my amazing husband doesn’t keep me busy enough.

Uh huh.

Here’s a quick peak at some of the things that I’ve been up to at Five days…5 ways, my primary blog where I write about a different theme for each day of the week (Move-it Monday—fitness, Try-it Tuesday—tutorials, Wardrobe Wednesday—fashion, 5 Things Thursday—a list with pics of 5 items on my mind, and Feature Friday— what/whomever I want to feature that day):

2011-06-28

When I’m not crafting or cooking or DIYing something-or-other, I love putting together fun and funky ensembles for next to no money.

Honestly, if you had told me even six months ago that I would write a style blog, I probably would have a) asked, “What’s a style blog?” and b) said, “Yeah, right!” once you explained it to me.

Don’t get me wrong. I love style. And I think that I’m at least competent at combining various pieces for a cohesive look, but blogging about it had never occurred to me until I started posting some of my low-dollar, high-style looks on my Wardrobe Wednesday segment at 5D5W.

You see, I buy almost all of my clothes at Goodwill. And by “almost all,” I mean probably 95% of my closet (click to view my master closet transformation). I’ve always been thrifty, even before I became obsessed with thrifting, but I never thought much of it until my readers started responding with, “I can’t BELIEVE you found that at Goodwill!” or, “I can’t BELIEVE you only paid $10 for that outfit, shoes and accessories included” (no, I didn’t leave out a zero; ten smackeroos!).

And it was then that I realized that I really could dress myself from the top of my head down to my toes in 100% thrifted fashion and look great doing it.

And Secondhand or Bare Bottom was born.

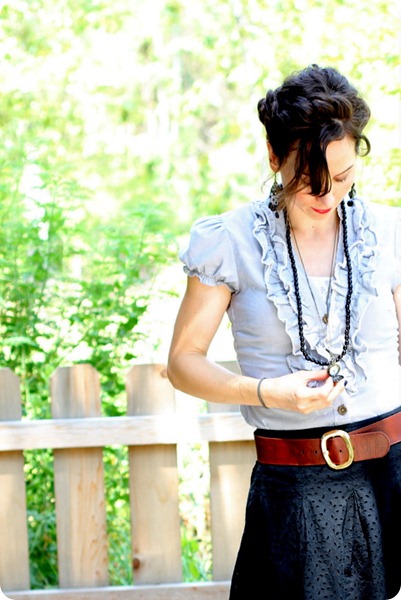
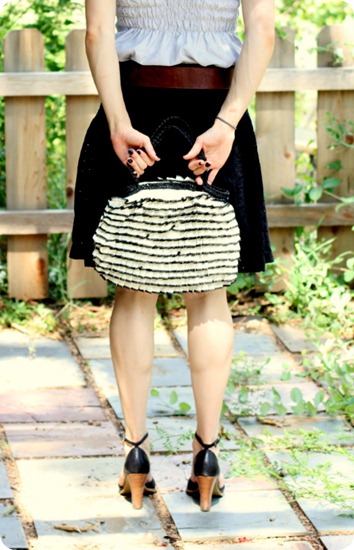
Top: Forever 21/Goodwill ($3), Skirt: Goodwill ($4), Belt: GW ($1), Shoes: Kenneth Cole for Tribeca ($3), Bag: GW ($3) Jewelry: Goodwill ($3), Rubber band: c/o I-forgot-that-was-on-my-wrist

TOTAL: $17

I call that ruffly purse my “Bugs Bunny” bag, since I could probably load it up with a brick, Bugs-style, and whack you upside the head with it, and you wouldn’t complain. It’s that cute.

Top: At Last/Goodwill ($3), Jeans: Abercrombie/GW ($5), Shoes: Calico/GW ($3), Belt: GW ($1), Purse: Vintage Saddle River/GW ($4), Earrings: GW ($2), Bracelet: Gift from the hubs

TOTAL: $18

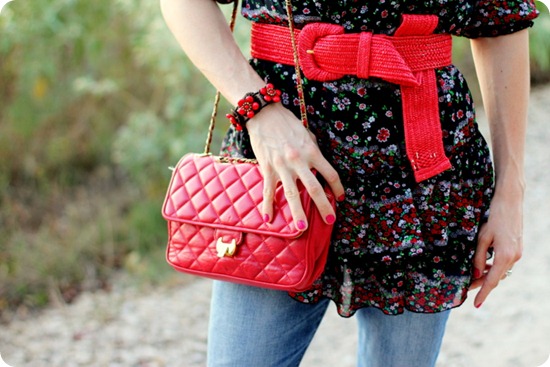
Anthro shoes, a vintage quilted leather purse, and more ruffles. *LOVE*

Sparkly tank: Old Navy/Goodwill ($3), Ruffled shirt: Ann Taylor Loft/GW ($3), Jeans: Miss Me/GW ($5), Shoes: Target/clothes-swap ($0), Earrings: GW ($2), Belt: GW ($1), Purse: GW ($3), Bracelet (which reads, “Boo loves Alby”): made by moi

TOTAL: $17

More ruffles (a theme, perhaps?), designer jeans, and killer accessories. Did I mention I got every bit of this at Goodwill?

How about one more?
 

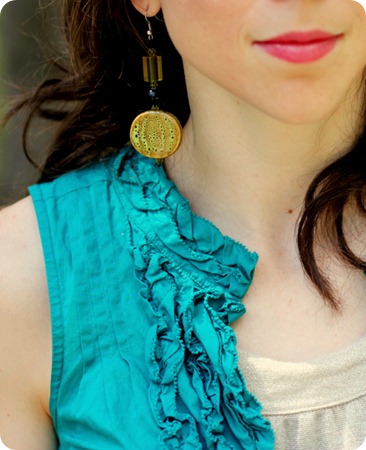
Dress: Goodwill ($5), Tank: GW ($2), Belt: GW ($1), Necklace: GW ($1), Earrings: Gifted, Shoes: Gifted

TOTAL: $9

Seriously, apparently I’ve never met a ruffle I didn’t like.

So, have I convinced you that you too can look fabulous without ever setting foot in a retail store?
I hope so.  But if you’re a thrifting novice and you feel lost about where to even start, let me recommend a guest-post I did for The Pleated Poppy’s popular What I Wore Wednesday segment where I shared some of my most helpful thrifting tips.

It will at least point you in the right direction.

And because my motto is, “If you can’t tell the difference, you shouldn’t have to pay for it,” I’ve also started a series at Five day…5 ways called Thrifted or Grifted, where you try to guess which between two outfit is 100% thrifted and which is 100% retail, and then you vote. It’s loads of fun!

I hope you’ll stop by and say hi at either/both of my blogs, and I’d love to hear any thrifty shopping tips you have to share. 

Thanks so much for reading along with me today and again to Nina for hosting me. What a gal!

Oh, and I’m dying to know…what’s the best fashion deal, thrifting or otherwise, you’ve ever scored?

I love hearing from you guys!

Hello there, folks!

I could go on for a paragraph about how excited I am to be here guest-posting for Mrs. Limestone, but…I have a feeling that’s not what you’re here for. Still, I have to say that Brooklyn Limestone was quite literally my gateway into the blogging world—the very first blog that I faithfully followed and a constant source of inspiration. I am so thankful to Stefanie for having me over for a visit!

My name is Abbie from Five days…5 ways and Secondhand or Bare Bottom. Yes, that’s right. I run not one but two blogs. Because being a mama to three children under 6, teaching fitness classes, trying to keep my house reasonably clean, knocking out a few DIY projects now and then, and spending time with my amazing husband doesn’t keep me busy enough.

Uh huh.

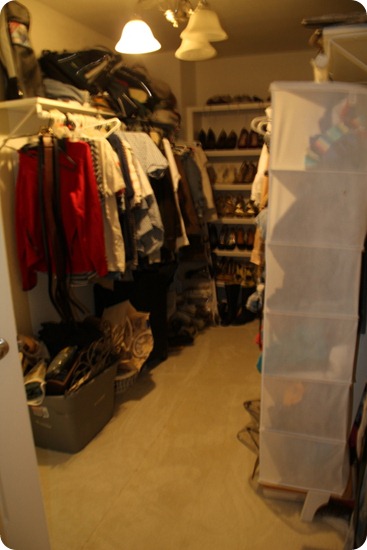
Today, I’m sharing a taste of my master closet, which I recently overhauled so that instead of looking like this:

IMG_2908-1

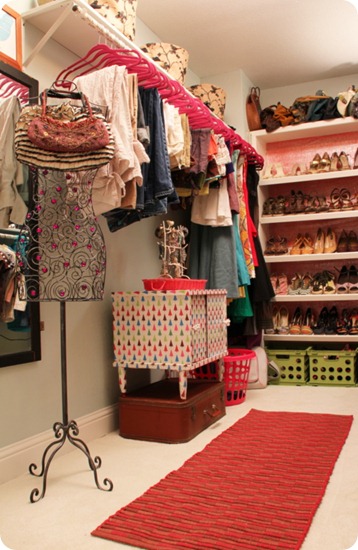
…it now looks like this:

IMG_4745

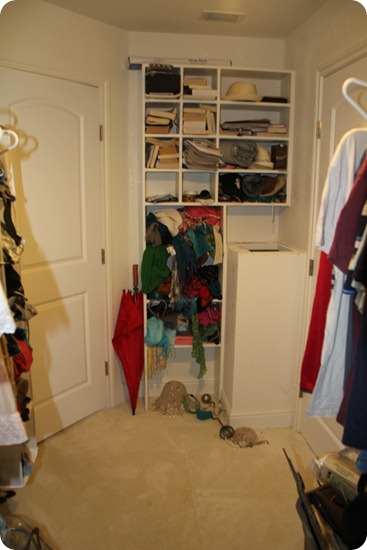
…and from this:

IMG_2912

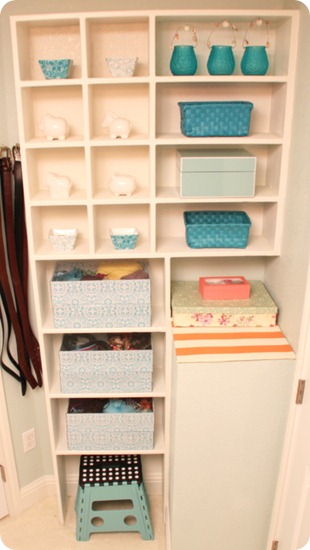
…to this:

IMG_4779-1

Basically, a classic case of good bones (my hubby built the custom shoe-shelf, the closet-rods, the cubbies, and the laundry chute) and bad styling and use of space.

But it was nothing a little (okay, a lot) of DIY elbow grease couldn’t fix.

Actually, I don’t remember any actual grease (thank goodness!), but I do remember lots of paint and glue (decoupaging = messy magic!) and sweat.

After , but I am beyond happy with the results, and it makes going in there to find outfits to wear for my 100% thrifted style blog, Secondhand or Bare Bottom, a fun excursion rather than a chore.

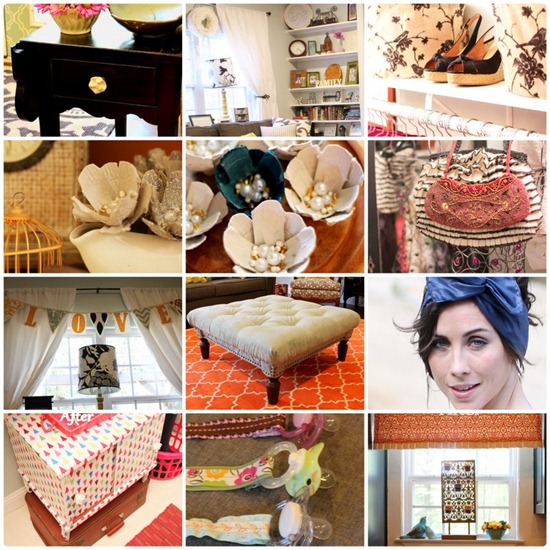
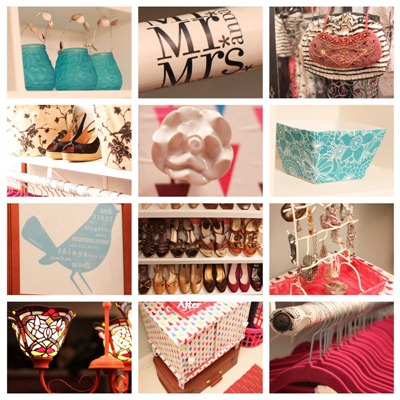
Here’s a collage of some of my favorite details:

2011-07-27

Oh, aqua and fuchsia, how I love thee!

Want to see the entire transformation? Here you go!

Here’s a quick peak at some of the things that I’ve been up to at Five days…5 ways, my primary blog where I write about a different theme for each day of the week (Move-it Monday—fitness, Try-it Tuesday—tutorials, Wardrobe Wednesday—fashion, 5 Things Thursday—a list of 5 items on my mind, Feature Friday— what/whoever I want to feature that day):

Thank you so much, Cori, for letting me share with your fabulous readers! If you guys haven’t yet, make sure to stop by my blog and check out Cori’s guest-post for me about transforming an unfortunate bridesmaid dress into a pretty pencil skirt.

Abbie

I love hearing from you guys!

Hey there, Tobi’s Blog readers! First let me say what a treat it is to get to share a project with such a talented designer and blogger! I was so excited to be asked by for a visit to share what a little time, determination, and DIY vision can do for you. 

My name is Abbie from Five days…5 ways. I’m a wife, a mama to three munchkins under 6-years-old, a writer, a fitness addict/instructor, a thrifting addict (I also run a 100% thrifted style blog, Secondhand or Bare Bottom), and an incurable DIYer. Rarely do I see a room, a piece of furniture, or an accessory without thinking, “How could I do that myself for less?”

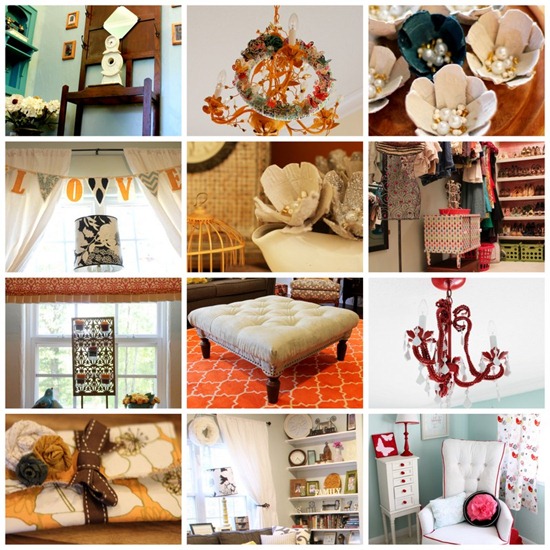
A dangerous question, sometimes, but it’s helped me accomplish some of the following projects:

Collages

See that tufted ottoman there in the center lower pic?  

I made that.

From a craiglist coffee table.

For less than $120.

Wanna know how? Well, read on, and I’ll tell you (I’ll even get you the info on I got that gorgeous orange rug…yes, I get asked that a lot).

First, let me apologize from the bottom of my tutorial-loving heart that I do not have a detailed picture for every step of this project. I began it before I started blogging (which, of course, means before I started documenting every detail of my life from what I eat for breakfast to how I brush my teeth). Unforgiveable, I know (I said I’m sorry, okay?) but I still think you’ll get a good idea of what to do from what I did capture.

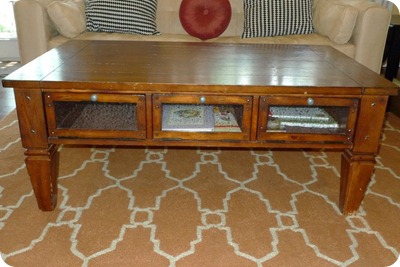
Here’s what used to reside in my living room:

215753_1990390324582_1388075794_32270234_343011_n

Absolutely nothing wrong with it. But I’ve been pining for an upholstered ottoman for a while now. I love the plush look—especially with deep tufting—but I do not love the price-tags that accompany that look.

$1,000 (*choke*). No thank you. I just don’t do pricey.

But I do do DIY (please don’t analyze that sentence). 

So, naturally, I started combing Craigslist for a coffee table. 

Wait, whaaa?

Why would I do that when I already had a perfectly respectable one of those already?

Patience, grasshopper ..and I will share my secrets.

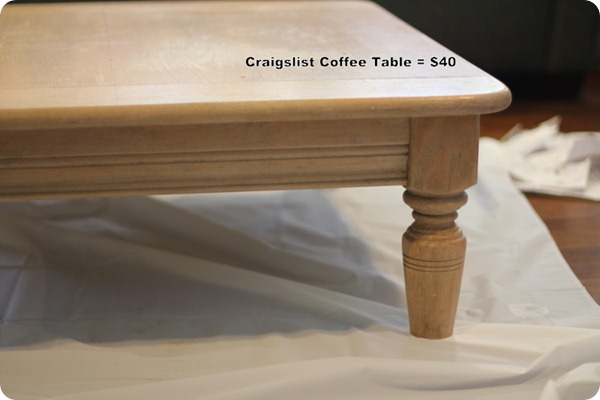
After only one search for “square wooden coffee table,” I found this:

IMG_1933-1

Really? How did that happen? (Especially when it started out $75, he wanted $50, and I got him down to $40). Not that I’m complaining.

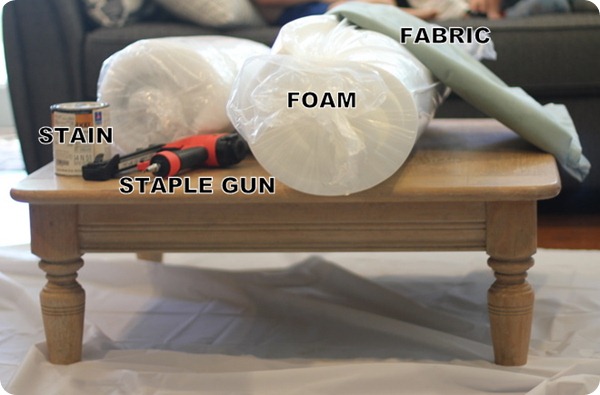
Then I piled some of this on top (Can you see where I’m going with this?)

IMG_1935-1

I wanted to make my ottoman extra-cushy, but foam is expensive, y’all, so let me give you a super-helpful hint: Hobby Lobby pretty much always has a 40% off coupon (you probably already knew that), AND they have 1” foam that comes in 39”X78” lengths for $19.99, so I got two rolls, cut them in half (since my coffee table just happened to be 38”X38”—and 78/2=39, so I had just enough…are you following?), and stacked them for a total of—wait for it—FOUR inches of 39”X39” foam…for only $24. 

Do a price comparison on foam anywhere else, and you’ll quickly see this is a fantastic deal!

Here’s the part where the pics get a bit skimpy, but it’s also the boring part, so I’ll just break it down for you:

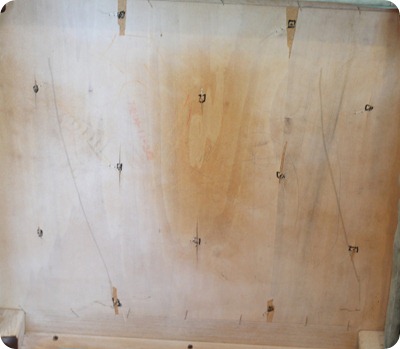
1) I decided on a twelve-button diamond tufting pattern, and my handy-dandy husband marked it out and drilled the holes for me. Here’s a view from the bottom:

IMG_4030

Gorgeous, no?

Hubby also shortened the legs for me so I wouldn’t end up with a tufted pub table. 

2) I did the foam cutting/stacking bit that I mentioned above using spray adhesive to hold the foam in place (yeah, that didn’t work. at. all). 

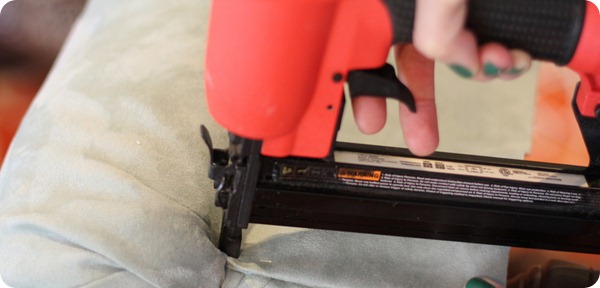
3) I wrapped the whole table-top in 1” quilt batting (that I also got @ Hob Lob with another 40% coupon; Tip # 2: if you’re as obsessed with bargains as I am, have no shame, and are willing to go back to Hobby Lobby 2-3 times in one day—so you don’t run into the same cashier twice…awkward—you CAN use multiple 40% off coupons!!!) and stapled the batting under the coffee table edges.

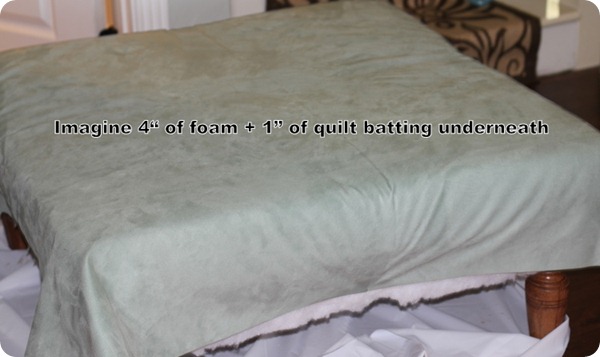
4) I draped the beautiful and practical (Durapella microfiber) sea-foam green fabric (that I found at Hancocks for 50% off the 50% off price) over the top of the foam.

IMG_1957

5) I stained the legs, but they never got as dark as I wanted, so I went back and painted them with a sample of Cordovan Brown that I got from Lowe’s.

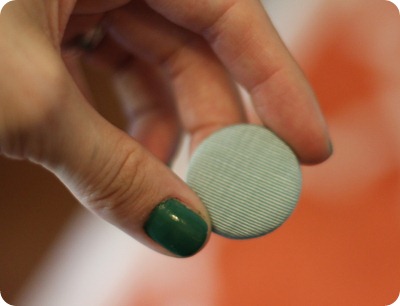
6) I then proceeded to cover my upholstery buttons (that I got at Hancocks for 40% off) with a scrap of Goodwill fabric I had that happened to match the rest of the fabric per-fect-ly (after discovering that the fabric that I had bought at Hancocks was too thick/inflexible to work for covering buttons)…

IMG_4036

And, no, my fingernails don’t have a fungus. Thanks for asking.

…then threaded them through the pre-drilled holes using a ginormous upholstery needle (jamming a 6” needle through 4” of foam is surprisingly therapeutic!), yanked them down to create deep tufts, and secured the thread to the underside of the coffee table.   

**If you want a detailed, pic-by-pic tutorial of how to do diamond tufting, this one is great, and I strongly recommend you follow it as it will save you several headaches that I experienced because I only found it after I was already done.

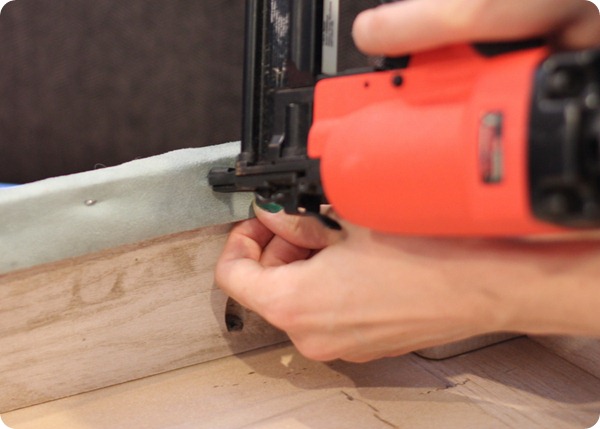
7) I knew I wanted a tailored “band” around the bottom of the ottoman. So I cut my fabric into four 6”X40” strips (one for each side of the ottoman, since I didn’t have a long enough strip to wrap all the way around), and stapled them underneath the “poofy” top section, like so:

IMG_4008

…then I folded the strips underneath and stapled them to the wood.

IMG_4020

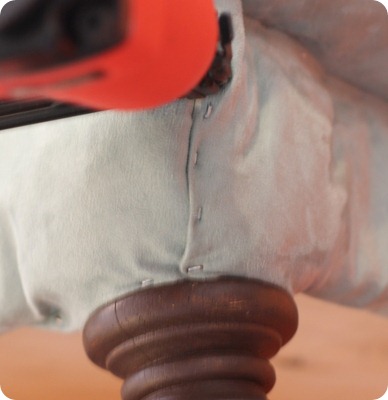
…and at the corners.

IMG_4035

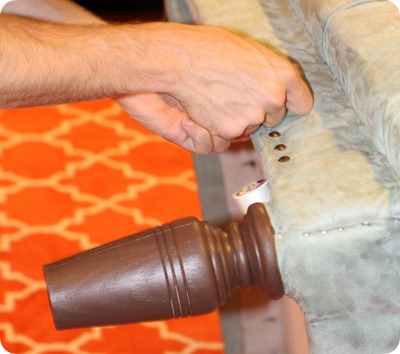
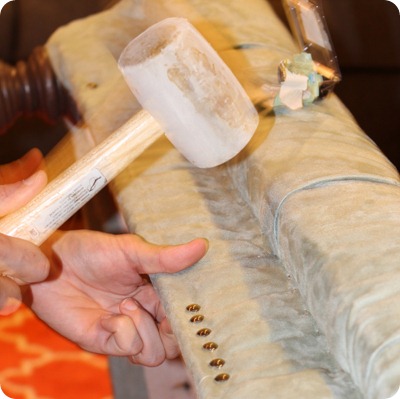
8) To cover all the visible staples, I added nail-head trim my hubby destroyed a bunch of nail-head trim tacks trying to do it for me (apparently that stuff wasn’t meant to be driven into aged oak covered in batting).  All seemed lost (yeah, I was gonna throw the whole thing out on account of not having nail-head trim) until he got the brilliant idea to drill shallow holes for each nail-head tack to rest in before he hammered them home with a rubber mallet.

Have I mentioned he’s my hero?

IMG_3850

and he has the greatest hands! (I’m a hand girl).

IMG_3851

9) I turned it over, took pictures of it…

AND

10) …showed it to you! (I was too close to an even 10 steps to quit).

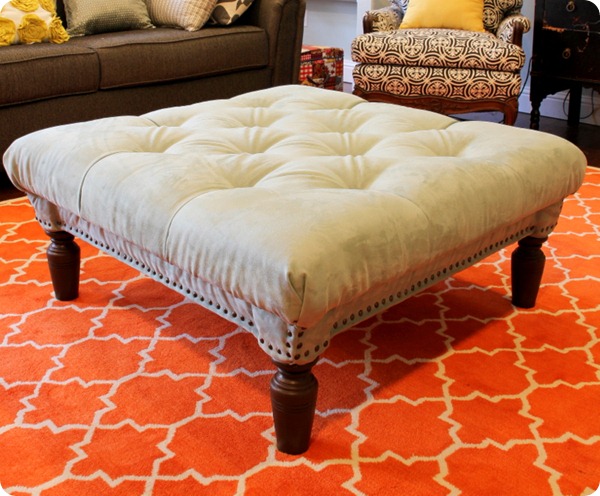
Here she is, my very own tufted ottoman!

IMG_3861

Meet Emmeline (a reader suggested her name, and I love it!)

A shot of Emmeline that gives you a taste of the rest of my living room. (Clicking on that link will take you to pictures of the detailed living room post and also reveal the secret of the rug).

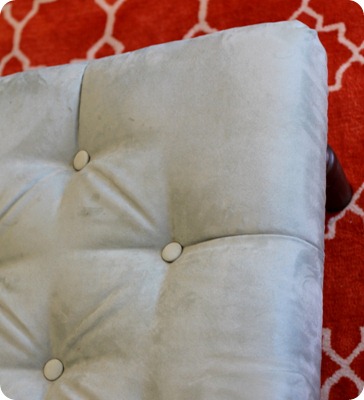
Here’s a shot with the buttons:

IMG_4054

Sorry if it gives you vertigo.

The cost breakdown (without factoring in the years off my life):

::Coffee table:: $40

::Foam:: $24

::Quilt batting:: $8

::Buttons:: $6

::Paint:: $3

::Upholstery thread + Needles:: $8

::Nail-head trim:: $12

::Fabric:: $15

TOTAL: $116

A similar option from Ballard Designs starts at a cool $400 and is 10 square inches shorter. 

Which makes mine a pretty stinkin’ awesome deal.

If I do say so myself.

And I do.

Well, that does it, folks! Thanks for coming along on my little DIY adventure! I’d love to have you by Five days…5 ways for a visit. I’ve got plenty of other tutorials, fitness tips, fashion ideas, and giveaways just waiting for you!

I love hearing from you guys!

Hey there, SoChick! readers. I’m Abbie from Five days…5 ways, and it is such a fun treat to get to visit and share in Melissa’s big shop-anniversary celebration. Congrats, girl!

Today, I’m going to show you how to make a super-easy ruffled ribbon flower clip. These turn out so cute and are incredibly versatile (think bags, belts, shoes, sweaters…anything that would be better with a flower clipped to it…which is pretty much everything, as far I’m concerned).

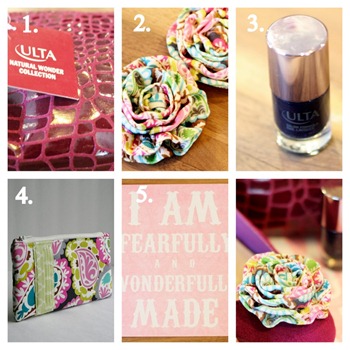
In fact, I’m giving away a pair of these cuties—along with everything else you see below (including one of Melissa’s fabulous clutches)in my September Giveaway, so if you haven’t already, make sure you enter to win you some prettiness.

2011-09-01

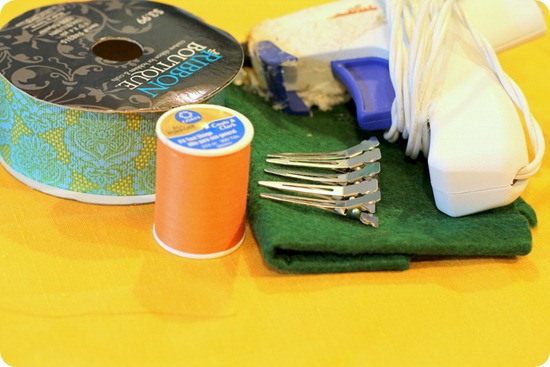
Here’s what you’ll need to get started:

IMG_6400


\


    • Ribbon of your choice: I used patterned 1.5” grosgrain ribbon (50% off at Hobby Lobby right now)
    • Coordinating thread
    • Glue-gun
    • 1.5” (or smaller) alligator clips
    • Felt (I just used craft felt for this project)

1.  Cut a 30” length of your ribbon. Once you’ve gathered your ruffle, this much ribbon should give you about a 2” flower.

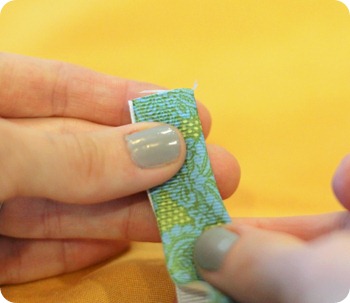
2. Fold your ribbon in half, wrong sides together:

IMG_6375

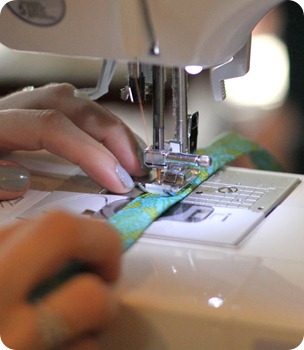
3. Starting with one end, back-stitch just a bit to secure your tip. Set your machine stitch to its longest length (you want your stitch fairly loose) and sew your edges together. Do NOT backstitch at the end of your ribbon. **You could definitely hand-stitch this as well:

IMG_6379

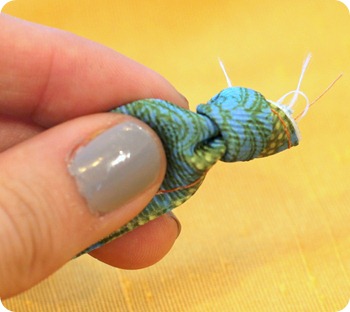
4. Make a knot in the backstitched end of your ribbon:

IMG_6383

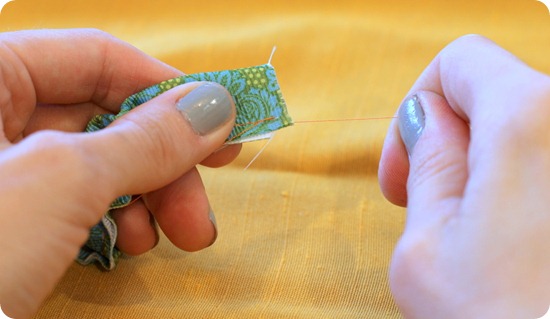
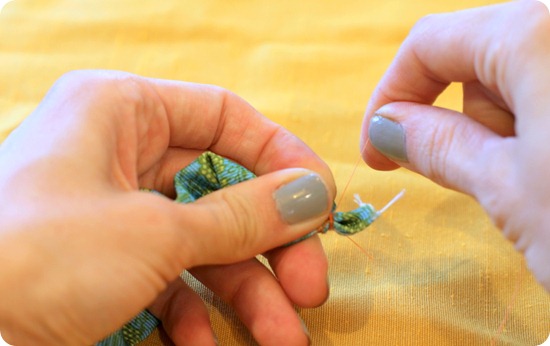
5. Grab one of your free threads at the opposite end and begin to pull and “scrunch”…

IMG_6385

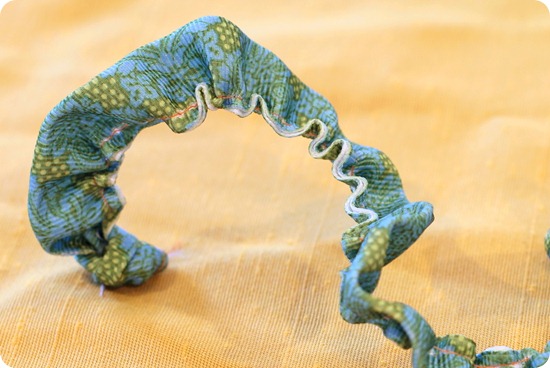
…until you have a ruffle that runs the length of your ribbon.

IMG_6386

6. Wrap the excess thread around the non-knotted end to keep your ruffle from…well…unruffling.

IMG_6387

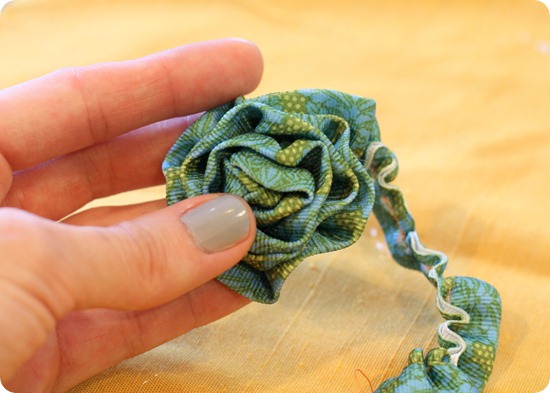
7. Starting with your knot, begin to wrap your ruffle clockwise (with the folded rather than the stitched edge facing up) around it, securing it with dabs of hot glue every 1/2” or so. 

IMG_6391

8. Once you’ve achieved the shape you want (oh yeah, and run out of ribbon), tuck the tail underneath the flower and secure with another dot of glue:

IMG_6392

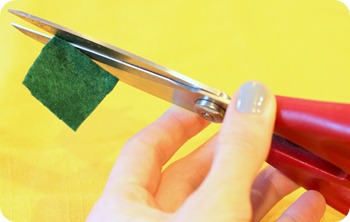
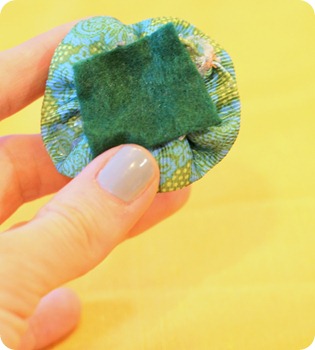
9. Cut a small felt square

IMG_6402

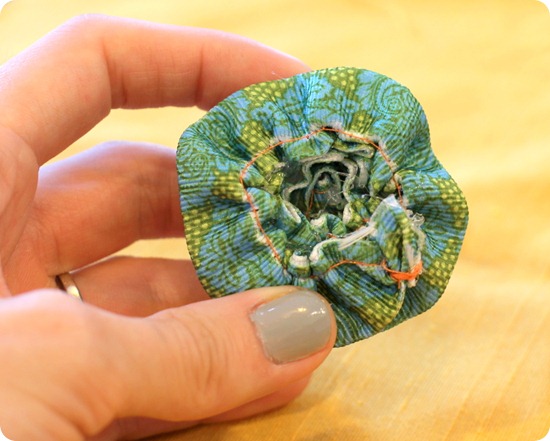
10. Glue your felt square to the bottom of your flower:

IMG_6404-1

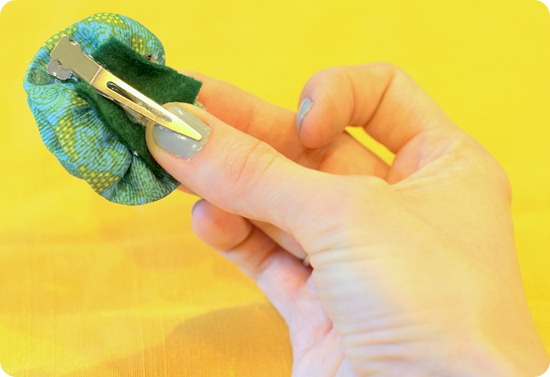
11. Glue your alligator clip to the felt square, making sure to separate the clips prongs so that you don’t glue them together.  (You could also hand-sew the clip to the felt square before attaching it to the flower, but I went with the lazybones version this time).

IMG_6405-1

12. Find something (or in my case someone) cute to clip it on, and stand back to admire your handiwork:

2011-09-03

I couldn’t choose a favorite shot, so I just included them all.

You’re welcome.

And there you have it! A high impact, low time-commitment little accessory that will have people asking you, “Where’d you get that adorable flower?” everywhere you go (and yes, I’m speaking from personal experience, but I did have it clipped to my daughter, so I think I cheated). 

If you’ve never stopped by for a visit, I’d love to have you by Five days…5 ways to say howdy! I’ve got lots more tutorials, thrifting advice, fitness ideas, a house tour—basically a little bit of everything—waiting for you.

Oh, and don’t forget about The September Giveaway (I’m still trying to figure out a sneaky way to win it myself)!

See you soon!

I love hearing from you guys!

by Abbie

Hi, my name is Abbie, and I’m testing out fonts to see if I like this one better than the one I’m currently using, and i’m pretty sure I do because it’s more feminine.

I love hearing from you guys!